
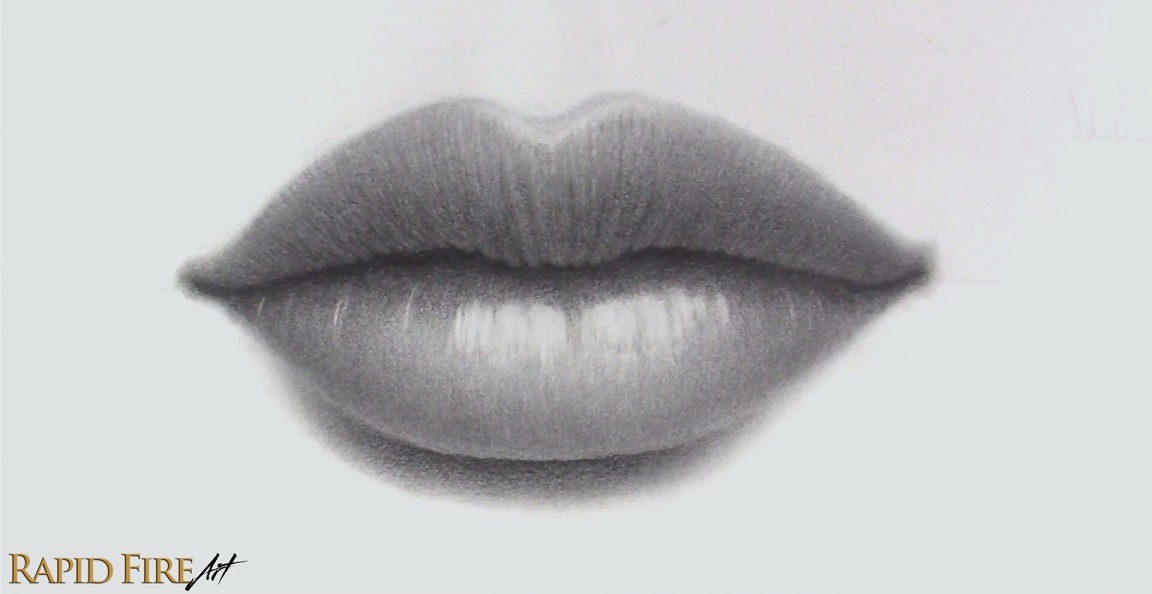
Hey, I’m Darlene and in this tutorial, I’m going to walk you step-by-step through my process of drawing a pair of thin lips, from the initial construction lines to shading, highlights, and final details.
For this drawing, I’m using the following tools:
- HB pencil for construction and lighter shading
- 5B pencil for darker shadows
- Kneaded eraser (you can make one using this DIY tutorial)
- Soft facial tissue for blending
- Smooth drawing paper
Before starting this tutorial, it helps to already understand basic lighting and how it wraps around forms. If you’re not familiar with that yet, I’d recommend reading my shading tutorial first, since it will make the shading process much easier to understand.
Step 1: Draw a Line
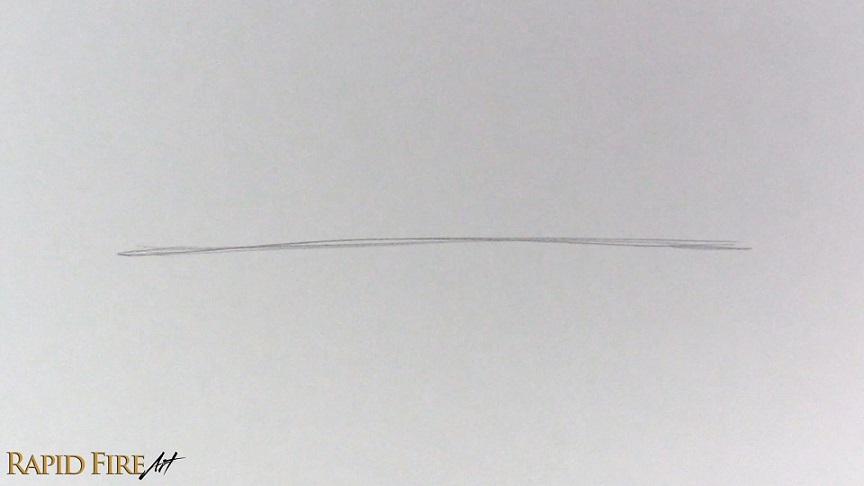
Begin by lightly drawing a curved line using an HB pencil. This line doesn’t need to be perfect since it’s only there to guide the direction of the lips.
The curve can tilt upward, downward, or sit flat depending on the expression you want. Just keep it very light because this will eventually be erased.
Step 2: Draw the Center and Corners of the Lips
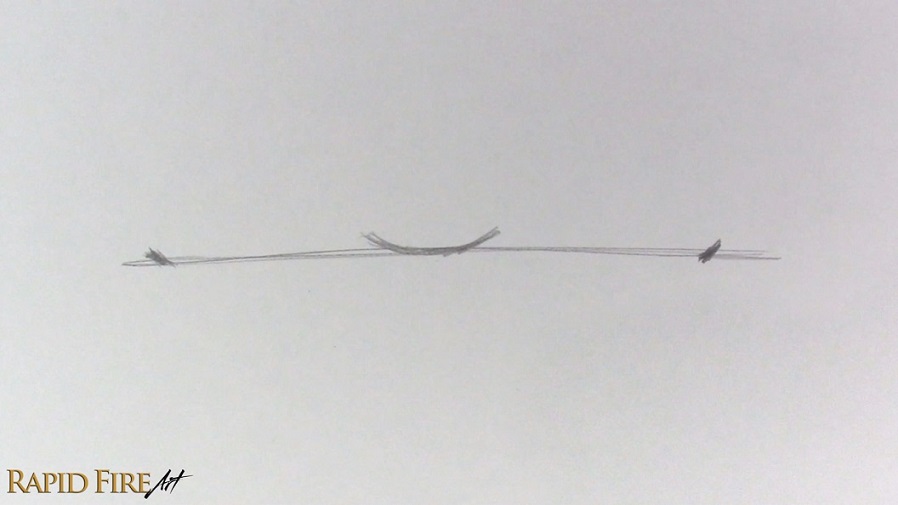
Along the line you just drew, draw a shallow “U” shape for the center point of the mouth. From there, draw small ticks on each side for the corners of the mouth. Make sure they are evenly spaced.
The further apart the ticks are, the wider the mouth will appear. You can adjust this based on your preference.
If you’re going to add this onto an entire face, I like to vertically align the corners of the lips with the middle of the eyes. To learn how and where to draw lips on a face, please refer to my face drawing tutorials based on the Loomis method.
Step 3: Complete the Opening of the Mouth
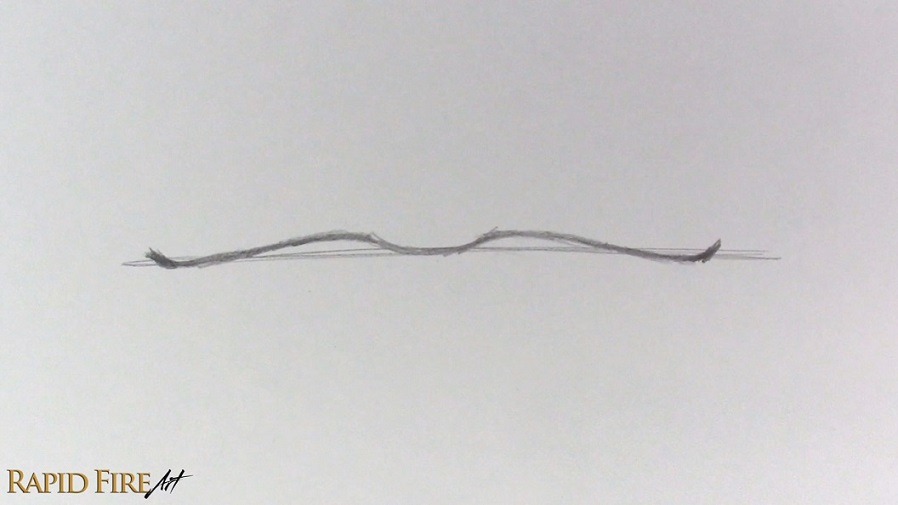
Now we’re going to play connect-the-dots! Using a wavy line, connect the corners of the mouth to the center. I’ve drawn a very stretched out “W” shape.
Try to keep both sides symmetrical. You can use your construction line from step 1 as a reference for symmetry. Once you’re happy with the shape, erase that first construction line since we won’t need it anymore.
Step 4: Draw a Thin Top Lip
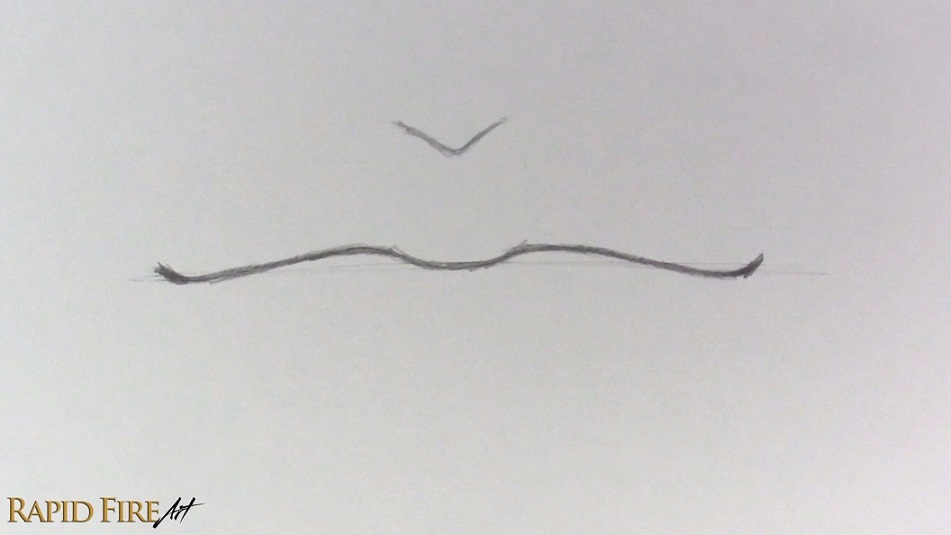
Start building the upper lip from the center and work outward toward the corners.
We’ll start by drawing a big “V” shape above the mouth’s opening. You can draw different shapes depending on the look you want, such as a smooth, shallow curve or almost a straight line. Adjust the height of this “V” based on how thick or thin you want the top lip to be.
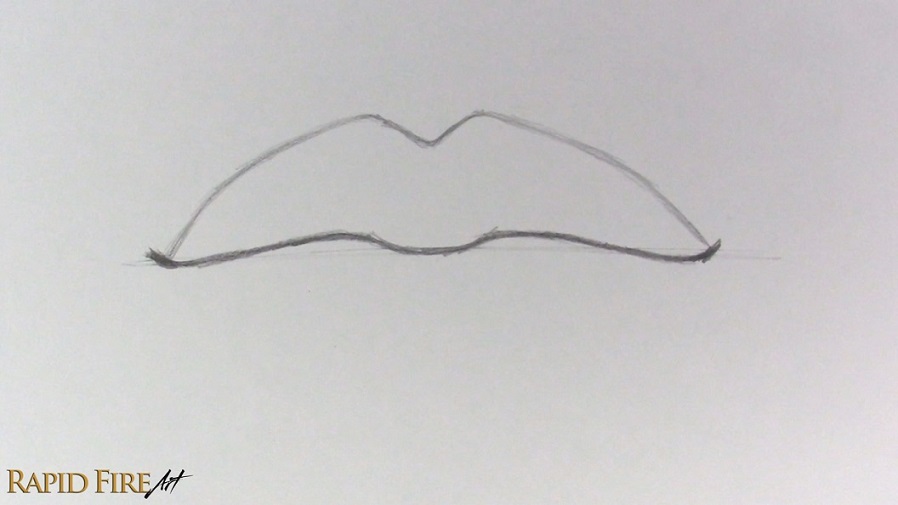
As you connect the cupid’s bow to the corners, make sure both sides feel level and symmetrical.
Step 5: Draw the Bottom Lip
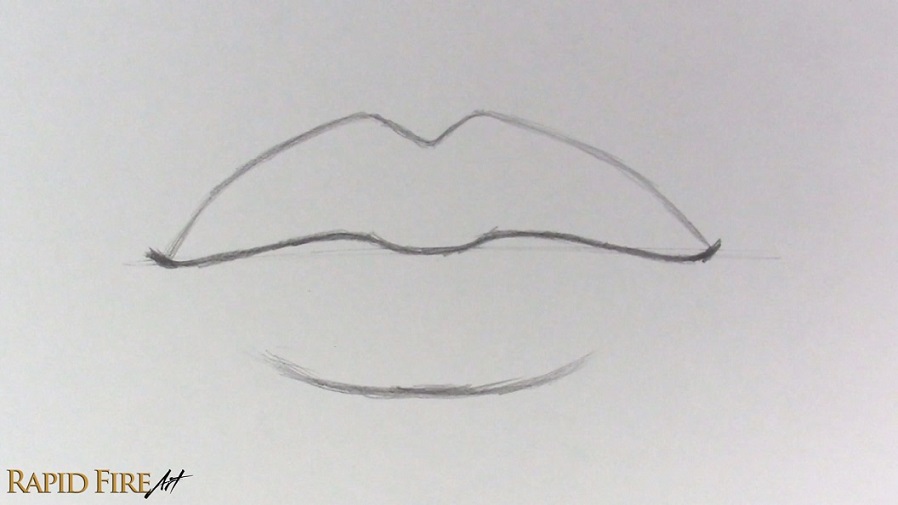
Again, start from the center and work outward.
The distance between the mouth’s opening and the bottom lip edge will determine how thin the lips appear, so keep that spacing small.
As you approach the corners, allow your strokes to fade out. We are going to avoid connecting the bottom lip outline to the corners of the mouth, unless you want to draw a mouth with dark lipstick or full lips that curve out to a great extent.
If you are interested in drawing very plump lips, check out this tutorial.
Step 6: Shade a Light Base Layer Across Both Lips
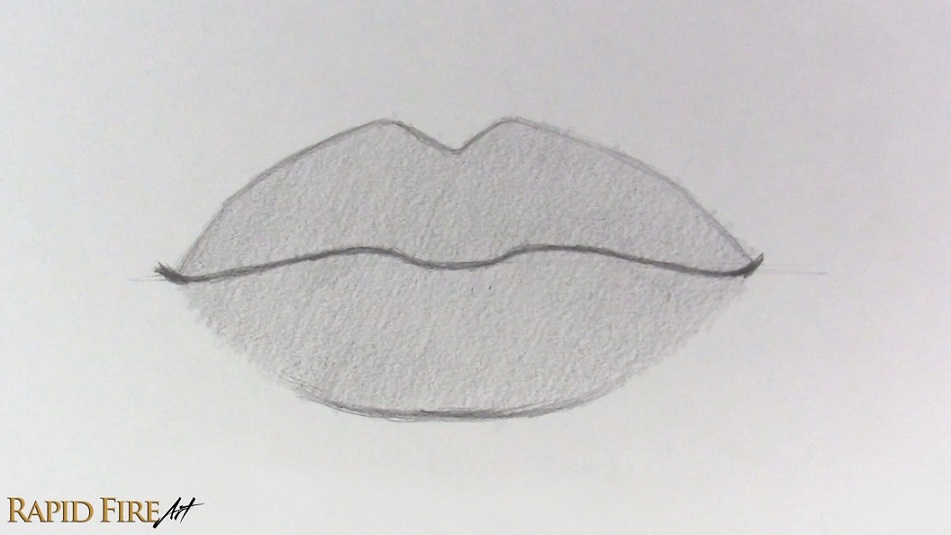
Before adding any detail, start by applying a light and even layer of graphite across both lips. This helps separate the lips from the white of the paper and gives you a mid-tone to build on.
I used a hatching technique here, keeping all my strokes going in one direction so the texture stays consistent. Using an overhand grip on your pencil can help you produce smoother and thicker strokes, which makes blending easier later on. Try to reduce any gaps between your strokes so the shading looks as smooth as possible.
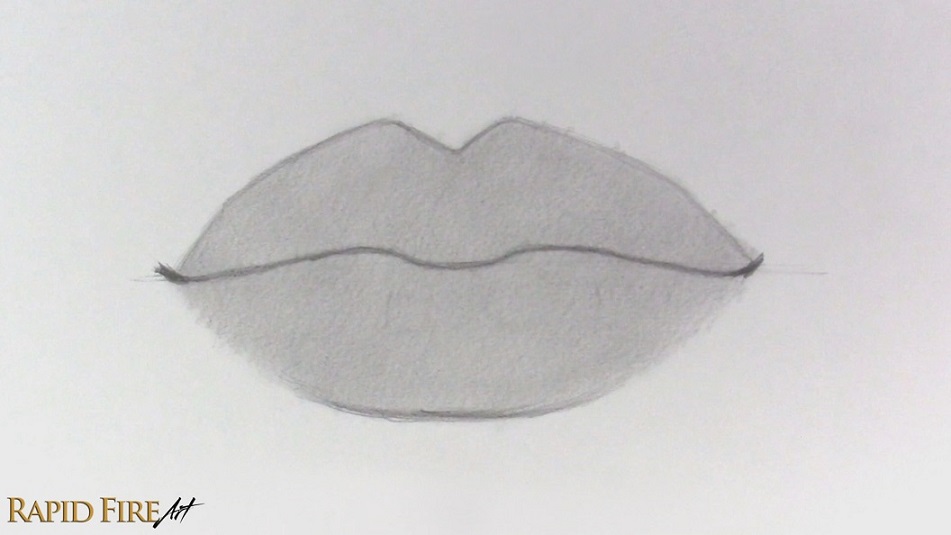
Once the graphite is down, use a soft facial tissue wrapped around your finger to gently blend everything. We are going to be layering on a lot more graphite later, so don’t worry if it doesn’t look perfectly smooth.
If the tissue becomes too dark or starts creating blotches, switch to a cleaner section and continue.
Step 7: Decide on Your Lighting and Mark Highlights
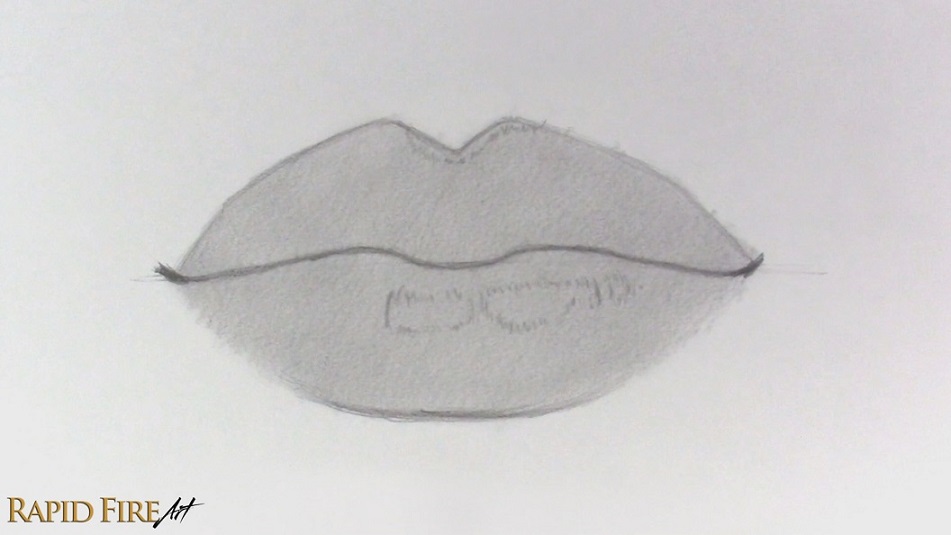
Before adding any darker shading, decide where your imaginary light source is coming from. In this case, the light is coming from the top right, so the upper planes of the lips will be lighter while the lower areas will naturally fall into shadow.
Think of the lips as a curved surface rather than a flat shape. Areas facing the light will always appear brighter, while areas turning away will gradually darken.
Once you’ve decided on your lighting, lightly mark out the highlight zones so you don’t accidentally shade over them later. These areas will be the lightest areas of the entire drawing and will help with conveying the curvature of the lips. You can see that my highlights are positioned more toward the right side where the light is coming from. I’m outlining the highlights using short strokes that follow the contour of the lip’s surface so when the drawing is completely shaded in, these outlines will naturally blend right in instead of having to be erased.
Step 8: Shade the Bottom Lip
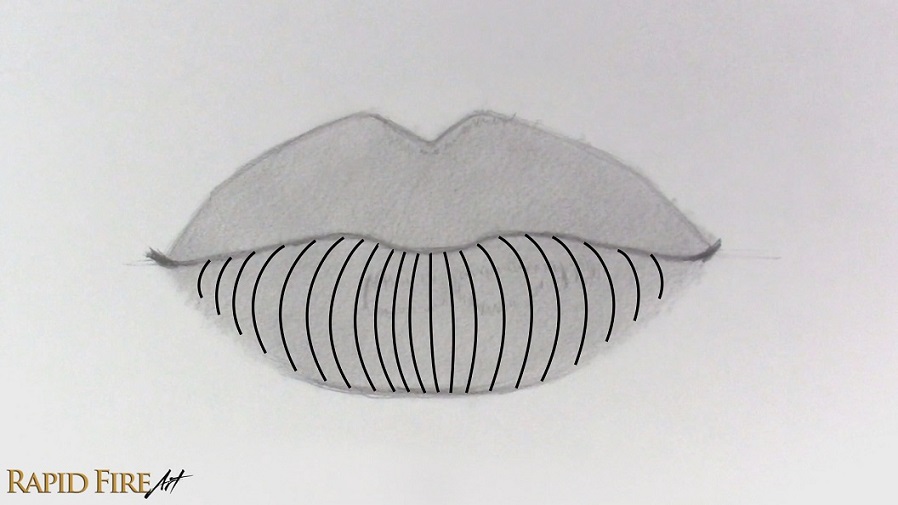
Now begin shading the bottom lip (still using an HB pencil). Instead of hatching, I’m switching to contour shading – This is where my strokes follow the curvature of the lips. These lines should wrap around the form rather than sit flat, because that helps the lips feel more three-dimensional. They also double as lip wrinkles!
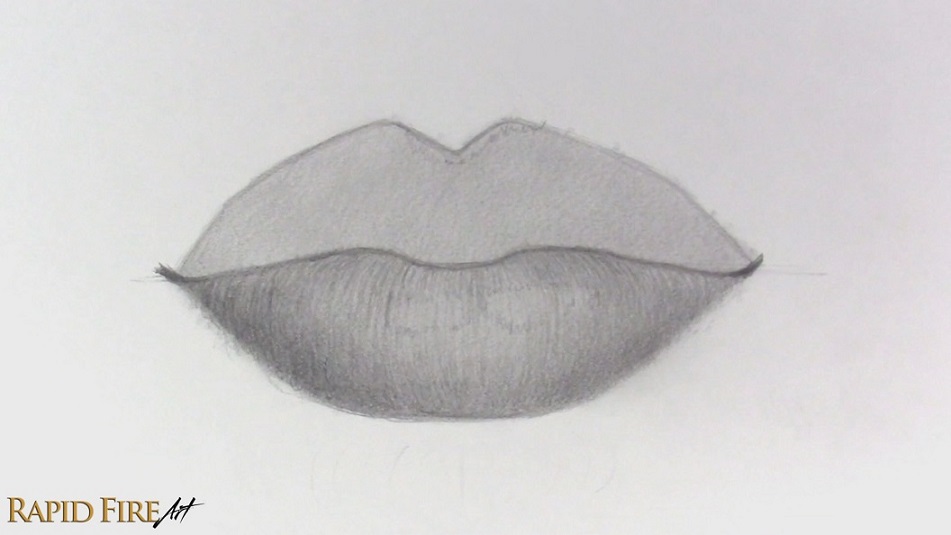
I used the pointy part of my pencil to draw these lines, but you can use a dull tip if you want the wrinkles to appear more subtle so the skin is less textured.
As you build up your contour lines, aim for a uniform value. Once you’re happy with the lip shape, make the bottom of the lip darker since it curves away from the light source. You can flick your pencil upward for each stroke to make the value transition between dark and light more gradual.
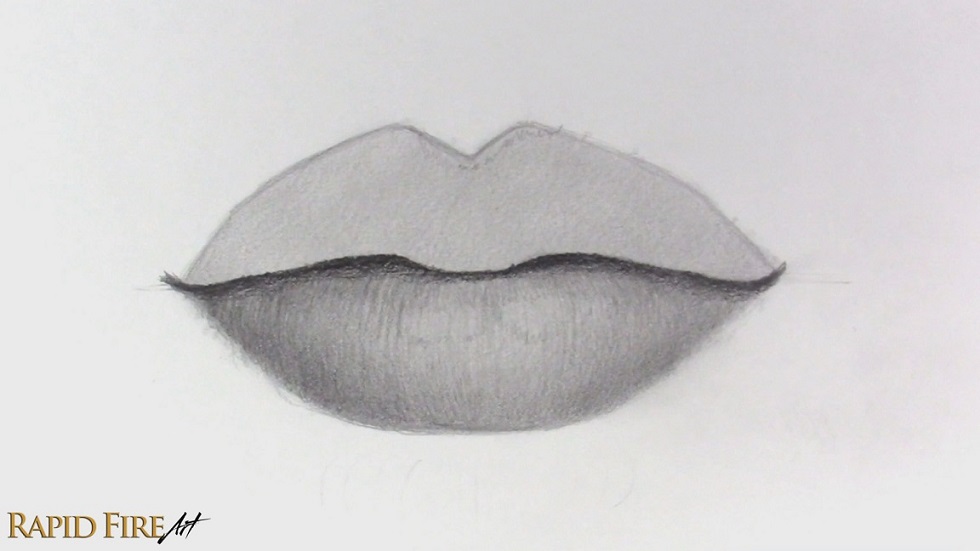
Add a cast shadow along the very top of the bottom lip using a softer pencil like a 5B. Using a softer pencil helps avoid hand strain and makes it easier to achieve darker values with less effort. If you don’t want your drawing to be too dark, using an HB pencil will help prevent that.
This cast shadow is caused by the top lip blocking light from reaching the bottom lip. The darker you shade this, the deeper the separation between the lips will appear and the more curved the bottom lip may come across.
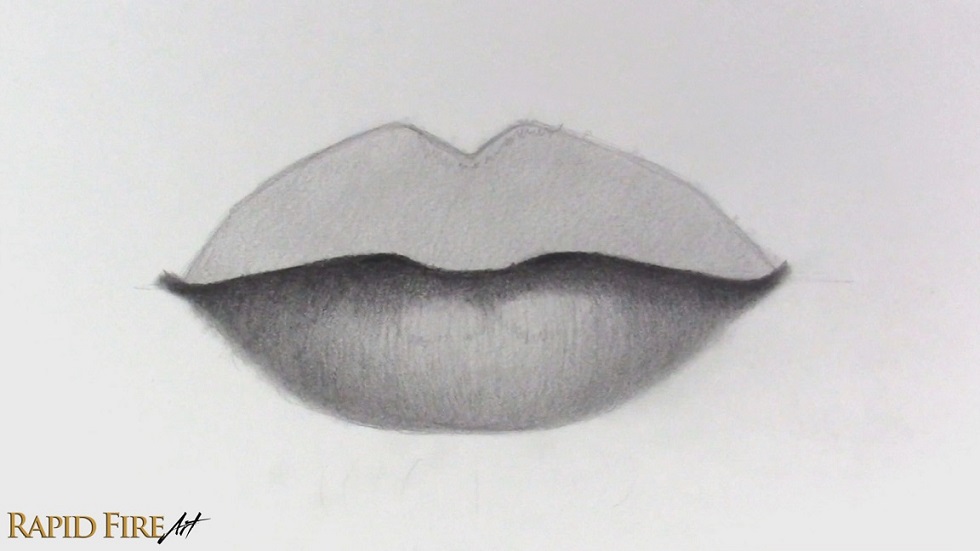
Use your pencil to blend those new values into the lip area below, creating a gradual value transition. Avoid shading into the highlight outlines we created earlier.
Blend all your shading along the bottom lip, going from light to dark to avoid smudging your work.
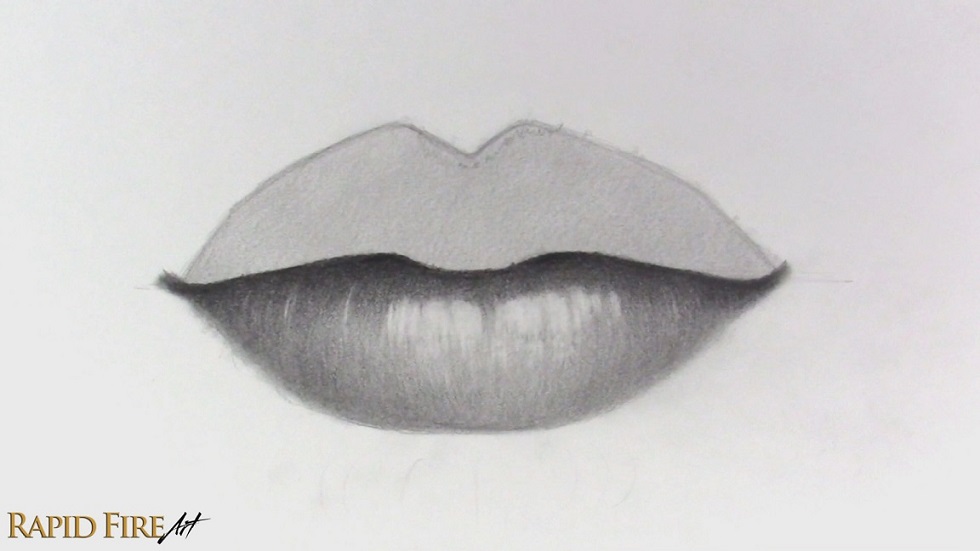
Use your kneaded eraser to remove graphite from the areas we marked out for the highlights. I used a downward swiping motion to get the bottom section of the highlight to fade out. You can add thin highlights following the contour of the lips in random areas.
Step 9: Shade the Top Lip
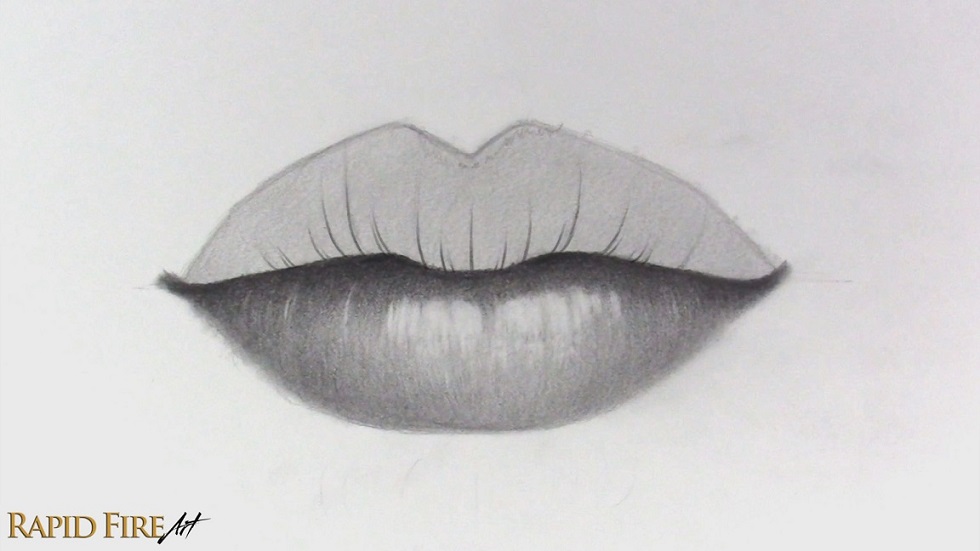
We’re going to follow a similar process for the top lip, except this time I want the lip to appear flatter, so I’ll use contour lines with less curvature (the contour lines above are just an example – I won’t actually draw them this dark). Since the top lip tends to have a more bunched-up skin texture, I’m also going to make the contour lines more noticeable than the ones on the bottom lip.
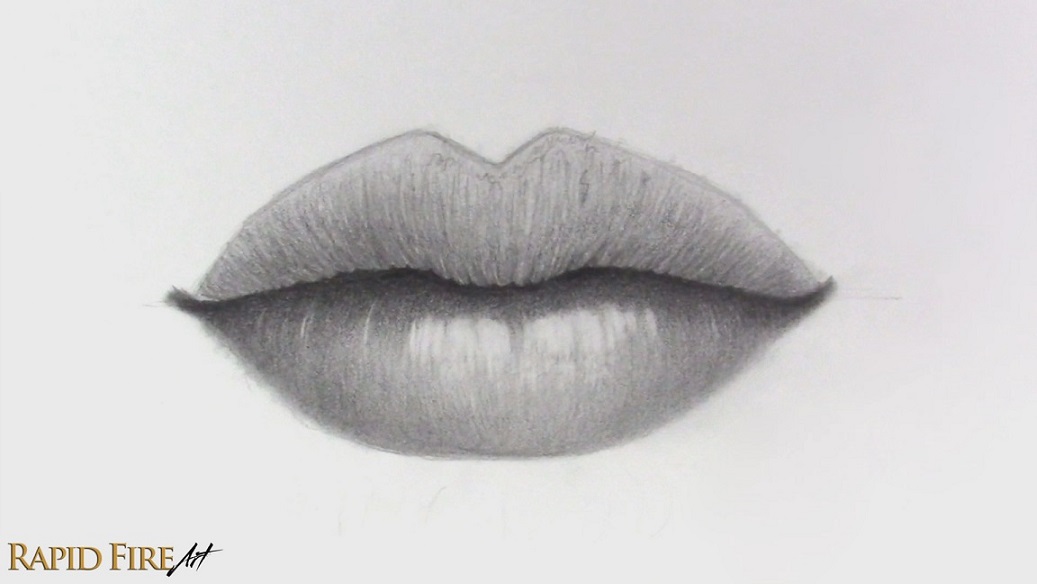
After drawing your contour lines using an HB pencil, identify the most prominent ones and then go along the bottom edge of the lip to bunch up the skin using your 5B pencil. Do this mostly near the center and less near the corners of the lip.
Below is an example of how I did this:
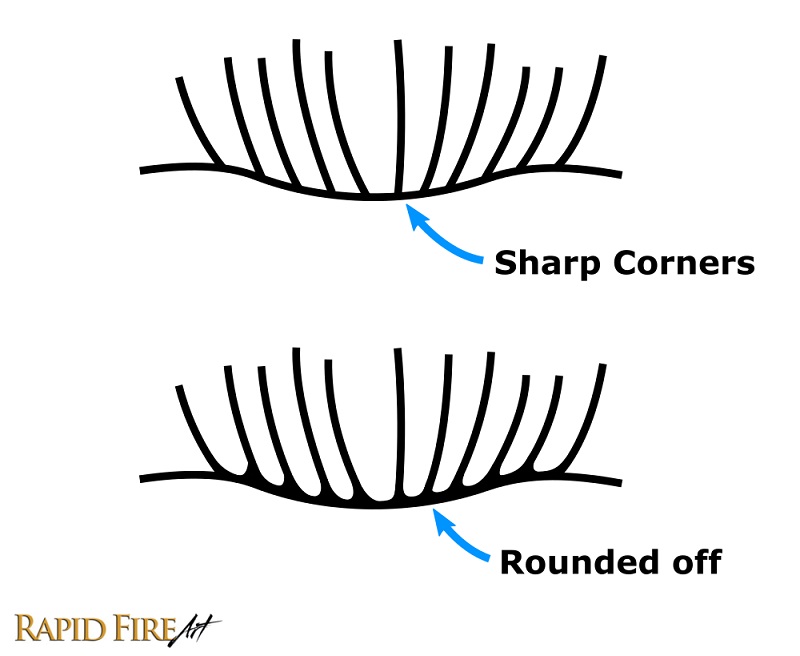
If there aren’t many prominent contour lines, you can bunch the skin first and then extend a dark contour line from each concave section.
Lighten your strokes as you work your way up, so the top of the lip looks smoother.
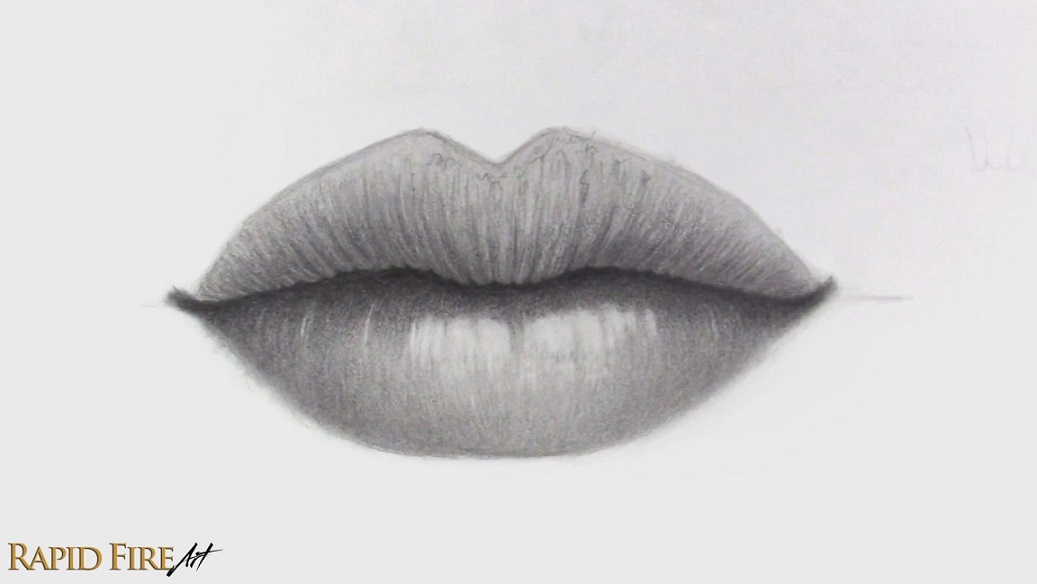
With your HB pencil, darken contour lines that are most prominent so they come across more like wrinkles.
If they just look like lines instead of wrinkles, shade along each one slightly while lightening your pressure as you reach the mid-point between the next wrinkle. Now the skin should look bumpy.
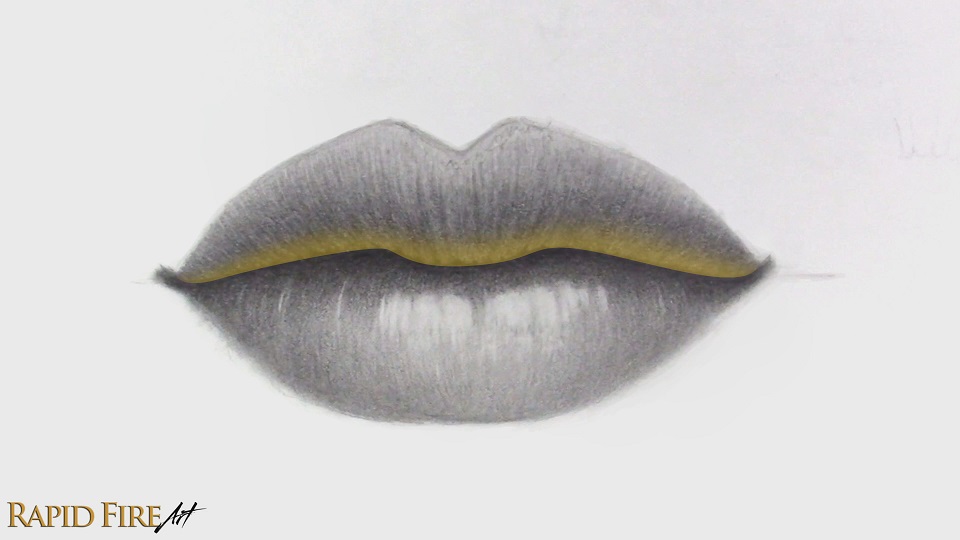
Shade the bottom of the lip darkest, while using contour shading, but keep the very bottom a bit lighter to account for reflections that hit the bottom lip and bounce back up. This is a small detail that may not feel like it makes a difference, but it absolutely does 🙂
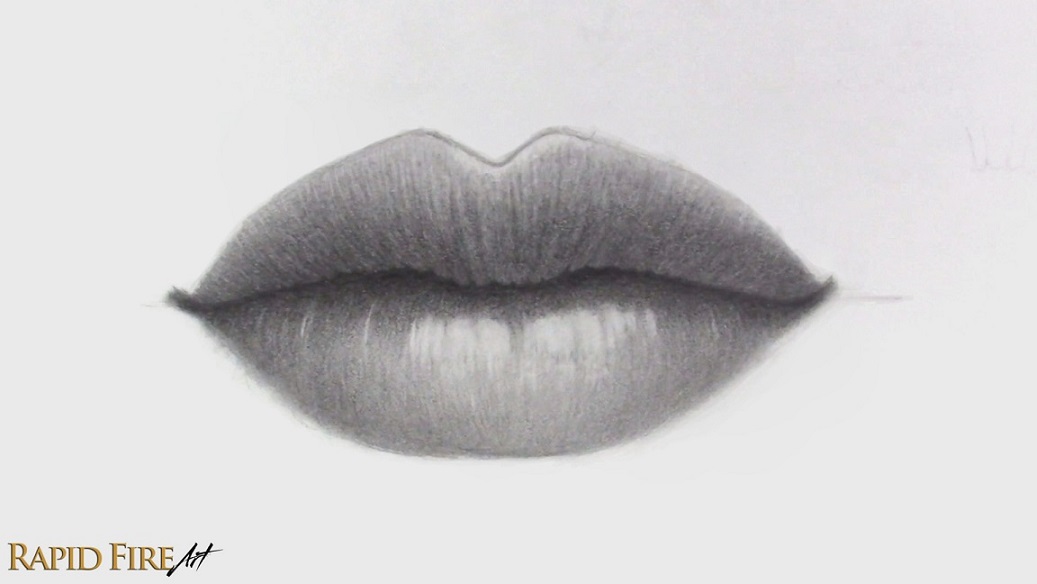
Continue shading upward to make the top of the lip gradually lighter. Use your eraser to lighten the highlight zone that we sectioned off in step 7 along the top of the lip.
After shading the top lip, you may notice that your lip outline has blended in. If it hasn’t, lighten or erase it so there isn’t an unnatural outline around your drawing. My cupid’s bow outline is still very apparent…
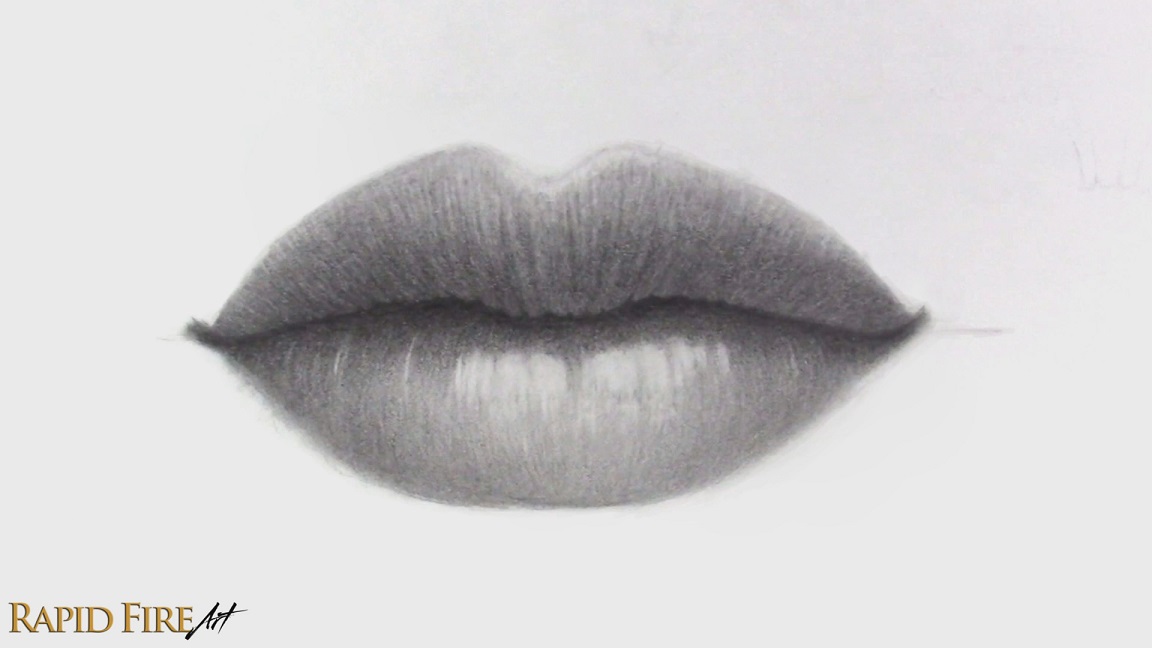
We need to make the outline disappear to improve the realism of our drawing. You can do that in a few ways:
- Lighten the outline with an eraser and then blend to soften it out.
- Or shade the skin above the lips to make the outline blend in/disappear
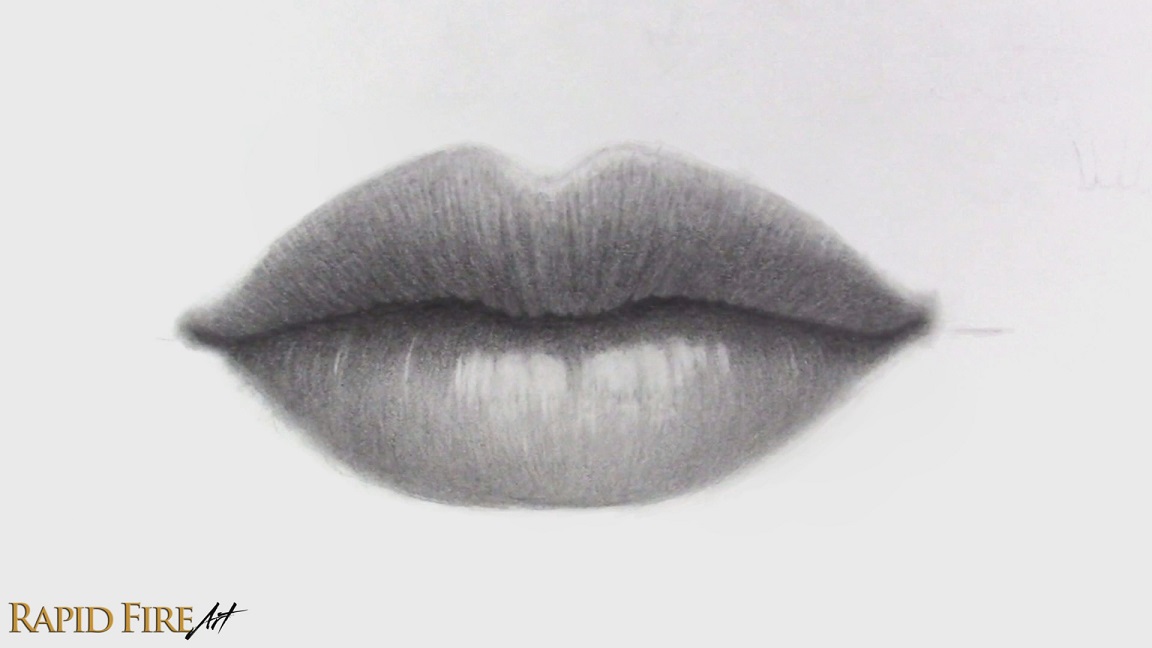
Then blend your work. Make sure to blend the corners of the mouth too.
Step 10: Add a Cast Shadow Below the Bottom Lip and Apply Final Touches
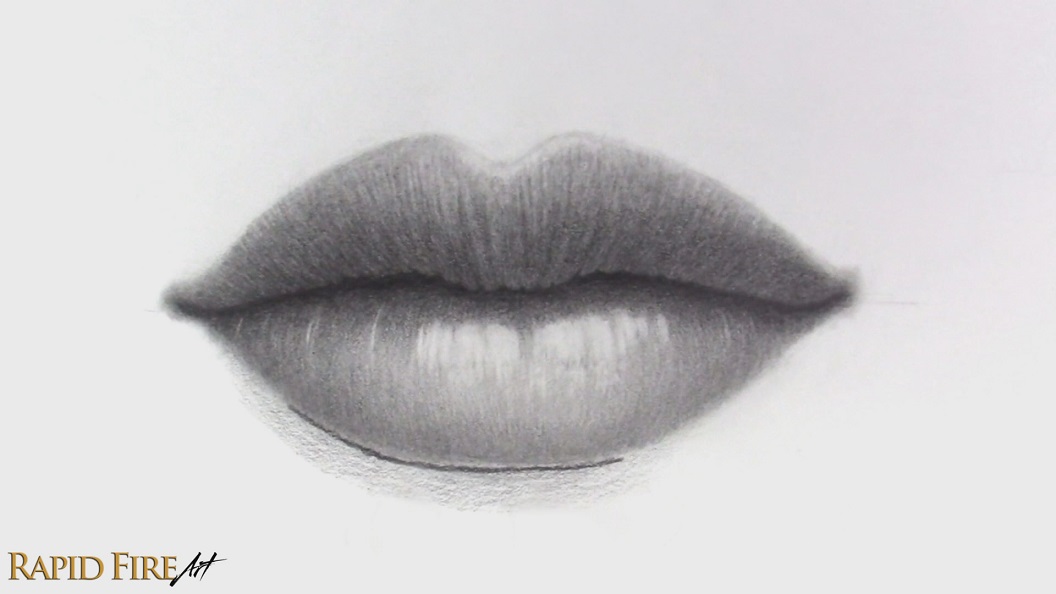
Let’s draw a cast shadow under the bottom lip to help lift the lips off the page a little more. Switch back to the 5B pencil or stick to an HB if you want a more subtle cast shadow.
Start by drawing a clean line along the bottom left edge of the lip (opposite the light source). This line acts as a boundary so the edge of the lip stays crisp instead of looking muddy or roughly shaded.
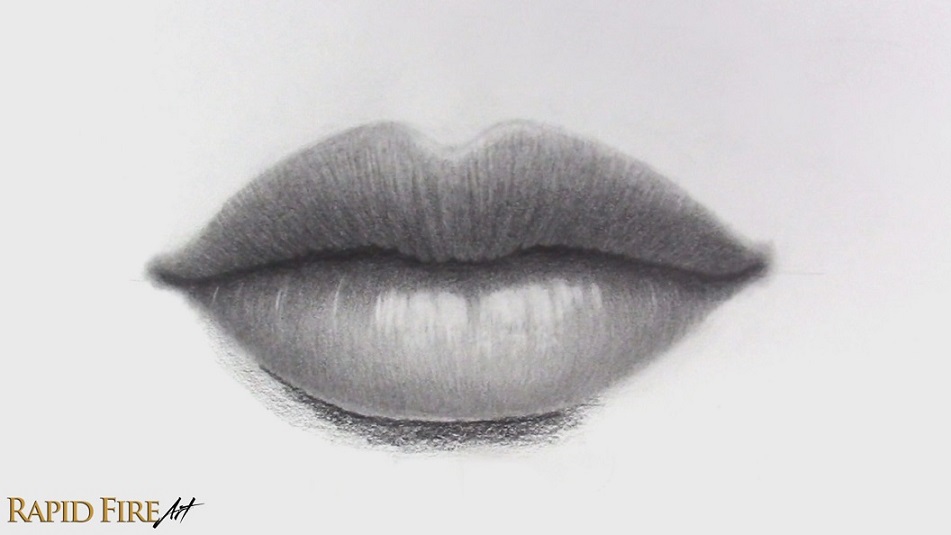
Shade as dark as you want directly underneath this new line, fading out as you work your way down.
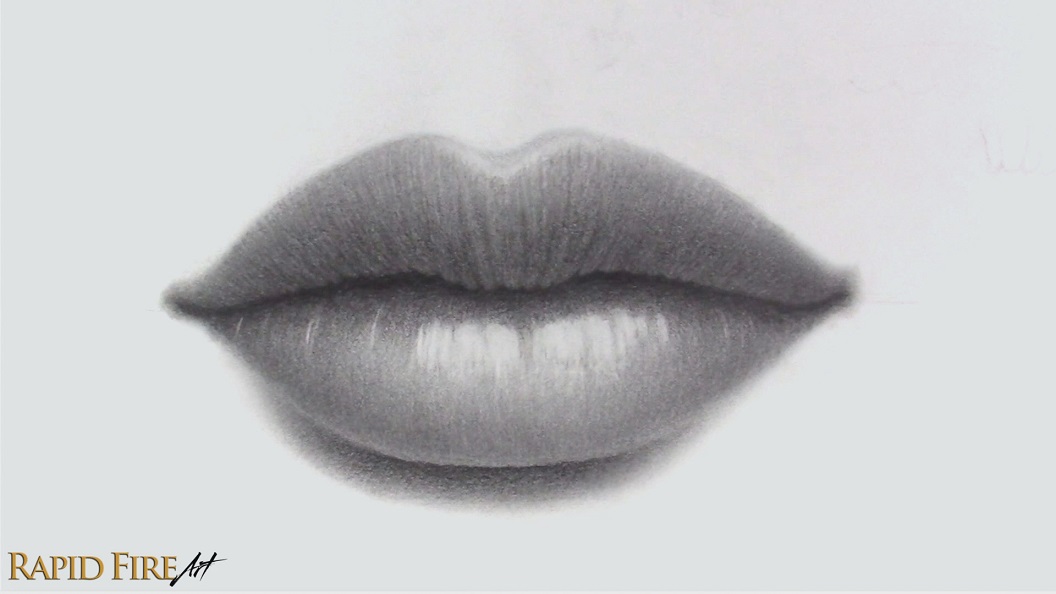
Blend this cast shadow very well, making sure the bottom edges are soft. Avoid blending too close to the bottom lip so the boundary stays clean and defined.
Now take a step back and look over your drawing. This is a good time to polish up any areas that feel inconsistent or flat. I like to check my shading for uneven values and see where I can increase contrast to make the drawing stand out more.
I used my kneaded eraser to brighten a few highlights and my 5B pencil to deepen the cast shadow beneath the top lip.
I also added a subtle value above the cupid’s bow and blended it out very softly. I like how this makes the highlight stand out more without looking too harsh.
Once you get comfortable with the construction and lighting process, you can use the same method to draw many different types of lips.
What’s Next?

Learn how to draw PLUMP lips
How does your shading affect how plump or flat a pair of lips will look?

Shading Fundamentals Guide
Learn how light works, how to shade smoothly, and practice pencil control with simple exercises.

Learn where to place lips on the face
Use the Loomis method to construct the head from any angle so your features sit on a solid foundation.

Having trouble achieving symmetry?
Learn how to make your eyes match using simple alignment techniques.

How to draw a smile showing teeth
Practice drawing a pair of eyes from the front view to build accuracy and confidence.

Darlene created RFA In 2013 with the goal of sharing simple yet detailed drawing tutorials with other artists on the world wide web. She is a self taught pencil portrait artist and Youtuber.


