
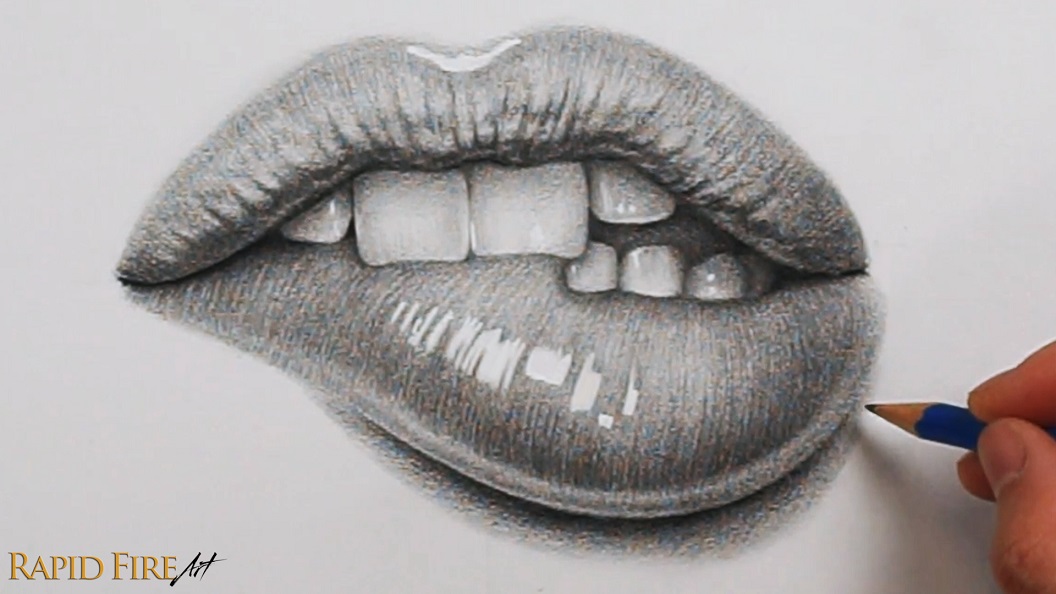
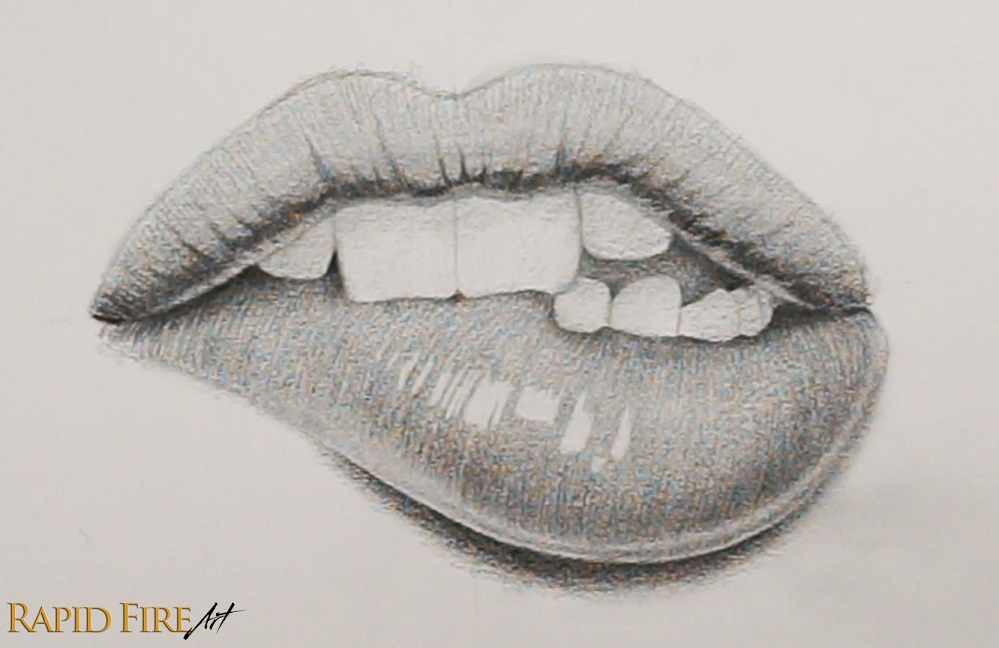
Learn how to draw realistic biting lips step-by-step in this detailed tutorial. I’ll walk you through the entire process, from sketching the basic shapes to adding realistic shading and details to create seductive, flirty-looking lips with realistic wrinkle textures.
You can use a single HB (school pencil) for the entire drawing if that’s all you have. Your drawing may just turn out a little lighter than mine.
Tools I Used:
- Staedtler Pencils: HB, 2B
- Gel Pen for highlights
- Mono Eraser Pen (for precise and clean erasing)
- Kneaded Eraser (for precise, delicate erasing without rubbing)
- Mono Block Eraser (for erasing construction lines quickly and cleanly)
- Facial Tissue (for blending or lightening)
- Canson Drawing Paper
- SmudgeGuard Glove (to prevent smudging and transfer of skin oils to drawing)
Step 1: Draw Guidelines for Biting Lips
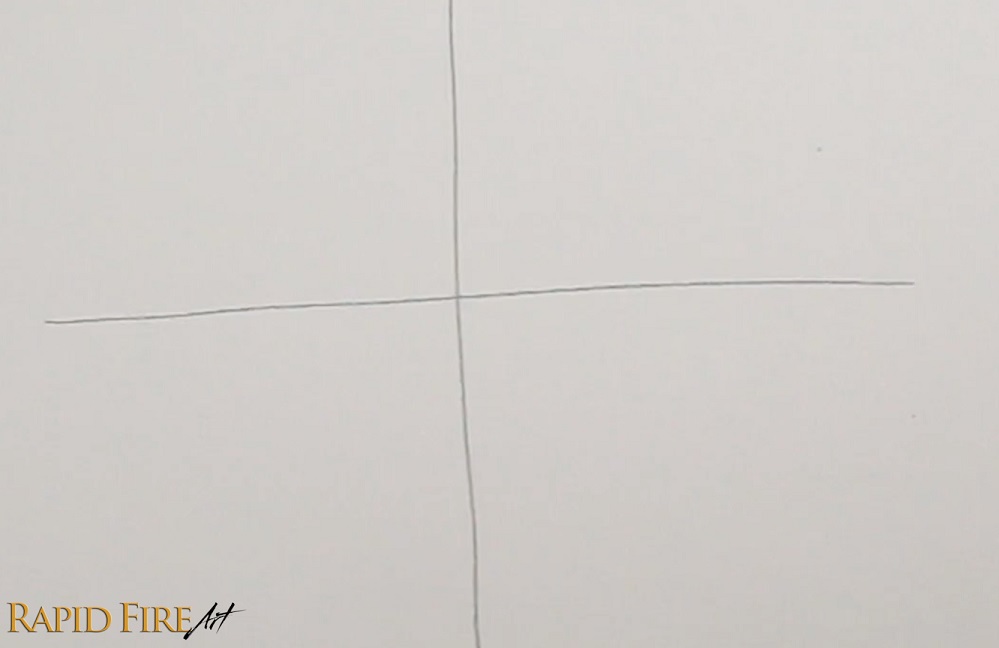
Using an HB pencil with light pressure, draw a large cross. Keep in mind that the smaller you draw it, the less detail you may be able to add, such as fine wrinkle texture.
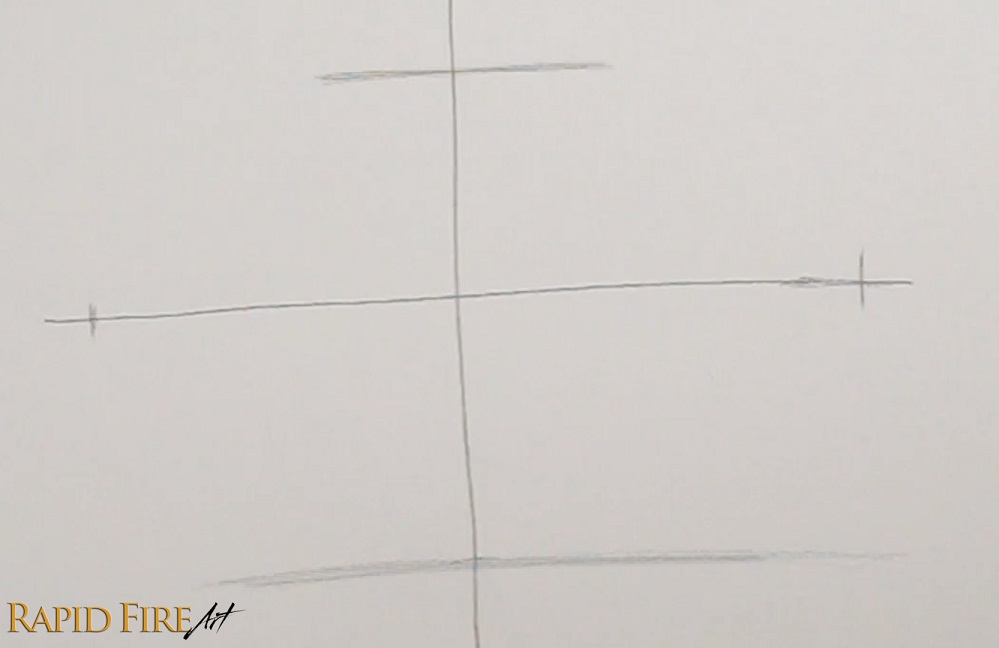
Then draw a tick on the left and right sides of the horizontal line. This determines how wide the mouth will be. Make the right tick a little further out than the left one.
Add two boundary lines along the vertical line to mark the edge of the top and bottom lip. You can space them an equal distance apart.
In case you want to draw your lips the same size as mine, my ticks along the horizontal line are 13 centimeters apart, and the ticks along the vertical line are 8.5 centimeters apart.
Step 2: Draw Outlines for Biting Lips
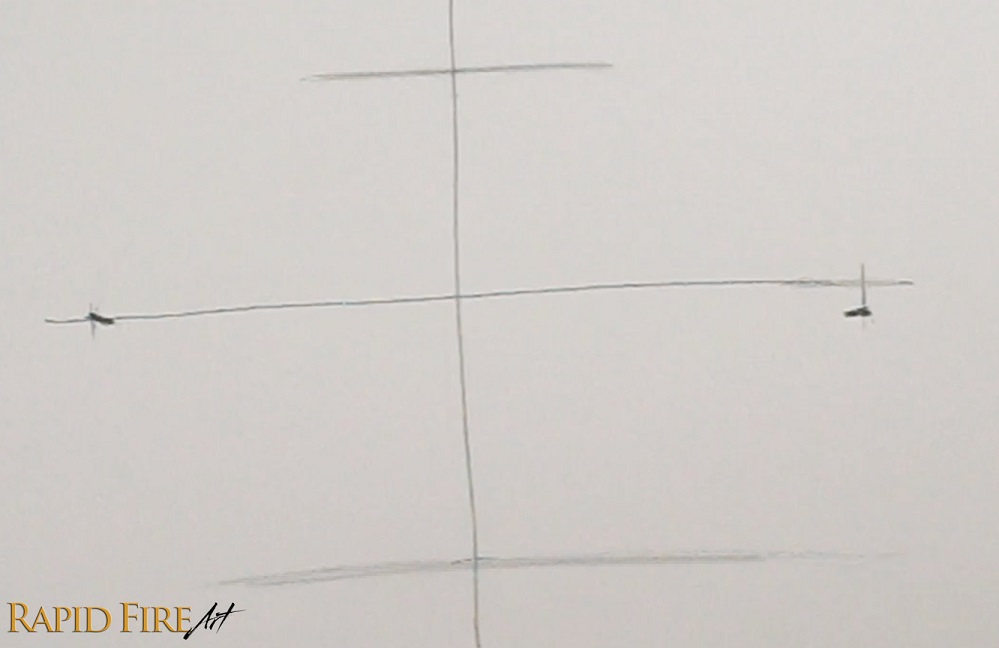
Now let’s draw the actual lips, starting with the corners of the mouth. We’ve already determined how wide the mouth will be using light tick marks along the horizontal line. Let’s draw some darker tick marks here for the corners of the mouth. On the right side, draw it below the horizontal line.
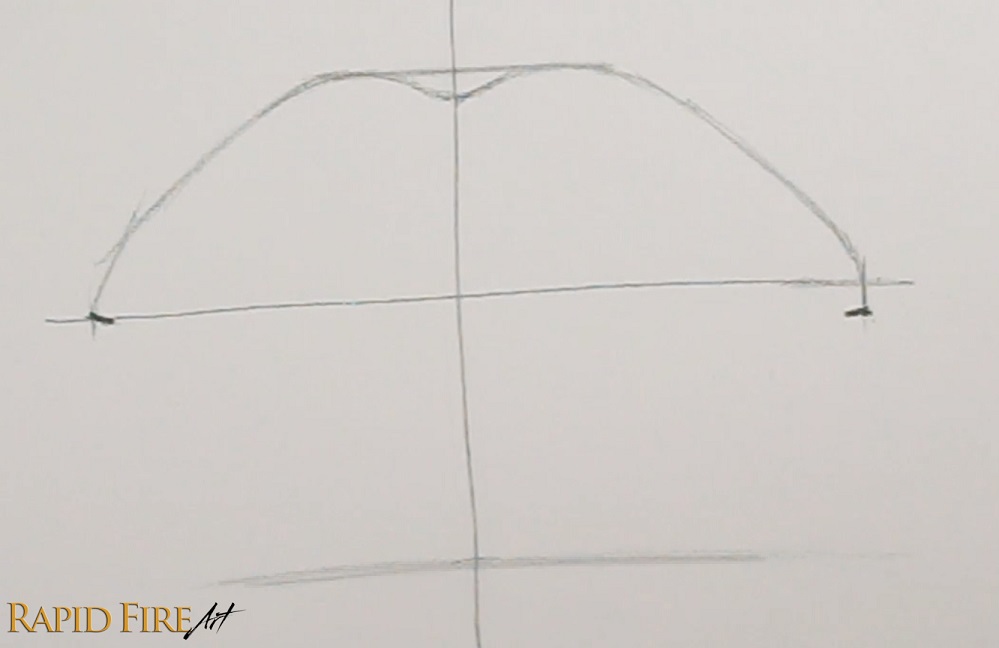
Let’s outline the top lip now. Start by drawing a wide “U” shape that is centered along the vertical line while staying within the top boundary line we drew earlier. Connect your “U” shape to the corners of the mouth.
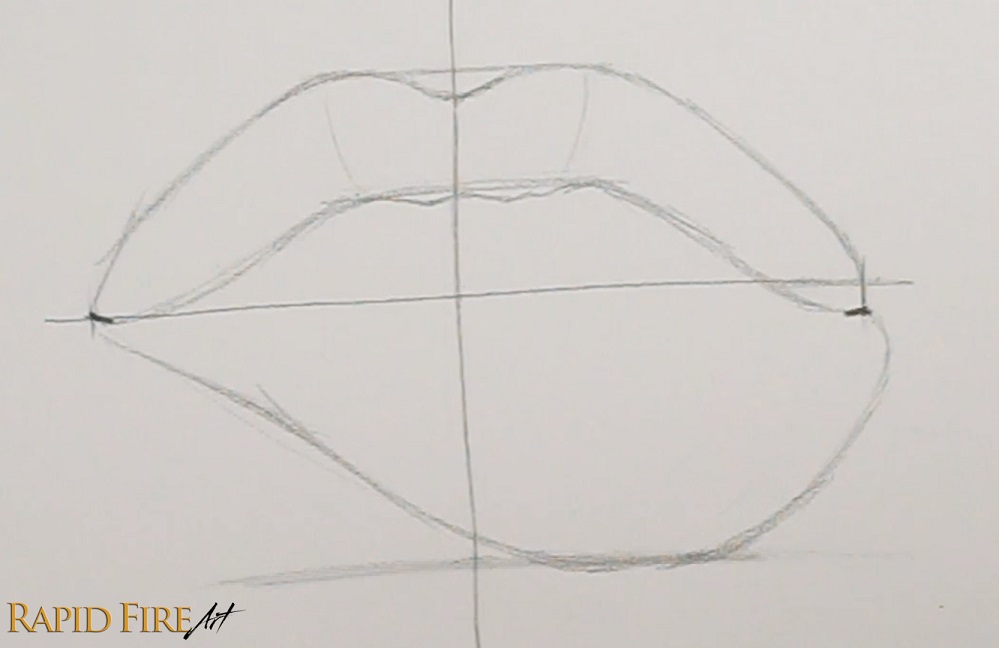
Draw the bottom edge of the lip lightly to gauge how thick you want the lip to be. Keeping your strokes light allows you to easily erase.
Draw the bottom lip resting on the lowest boundary line. Pull most of the lip to the right side of the vertical line.
If your lines look stiff and unnatural, make them a little wavy and soften out any sharp angles.
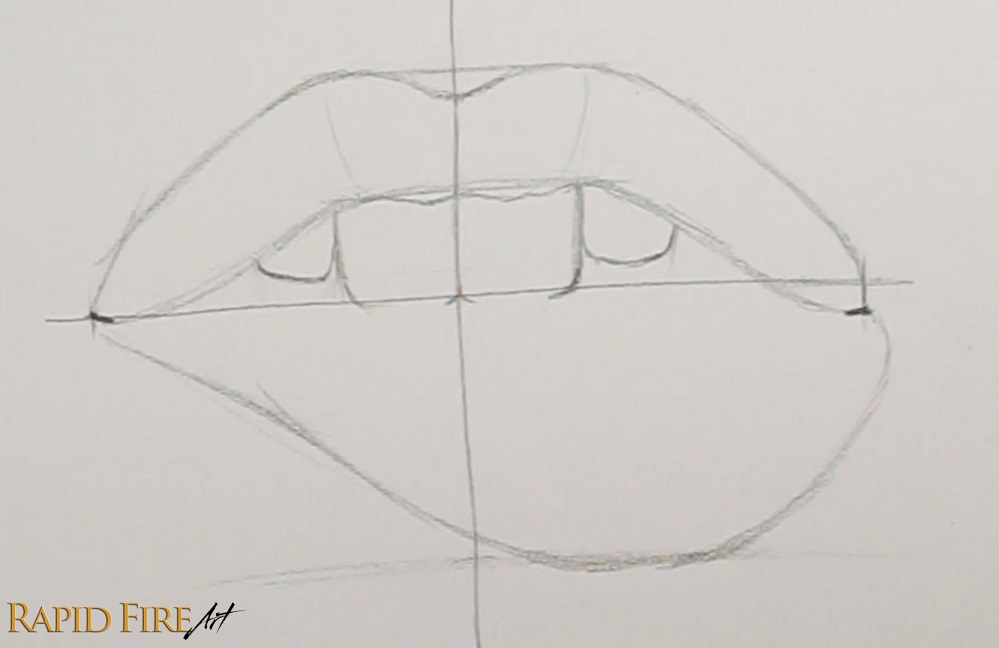
Using the set of guidelines we drew in Step 1, lightly draw the top set of teeth, starting with the two front teeth and then filling in the rest. My two front teeth are balanced along the vertical line and are kind of sitting on the horizontal line. Leave the bottom edge of your two front teeth unfinished for now.
Your drawing may reveal more teeth based on how thick your top lip is and how open your mouth is.
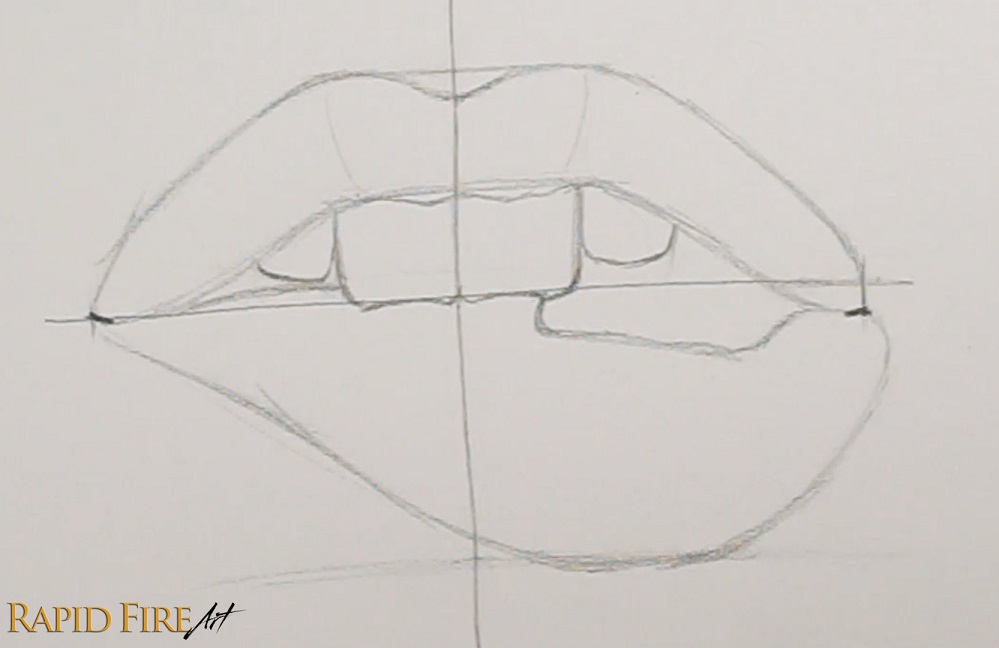
Now draw the top edge of the bottom lip. Where the teeth are biting down on the lip, draw two slight bumps to make it look like the two front teeth are digging into the skin. On the left, bring the skin up higher than the horizontal boundary line so it looks like a lot of skin is being pulled into the mouth.
On the right side, dip the skin down really low to show just how much skin tension there is. In my opinion, if the skin is drawn too close to the horizontal line, the biting lip drawing won’t look very seductive. You can adjust the height of the skin to experiment with what looks best to you.
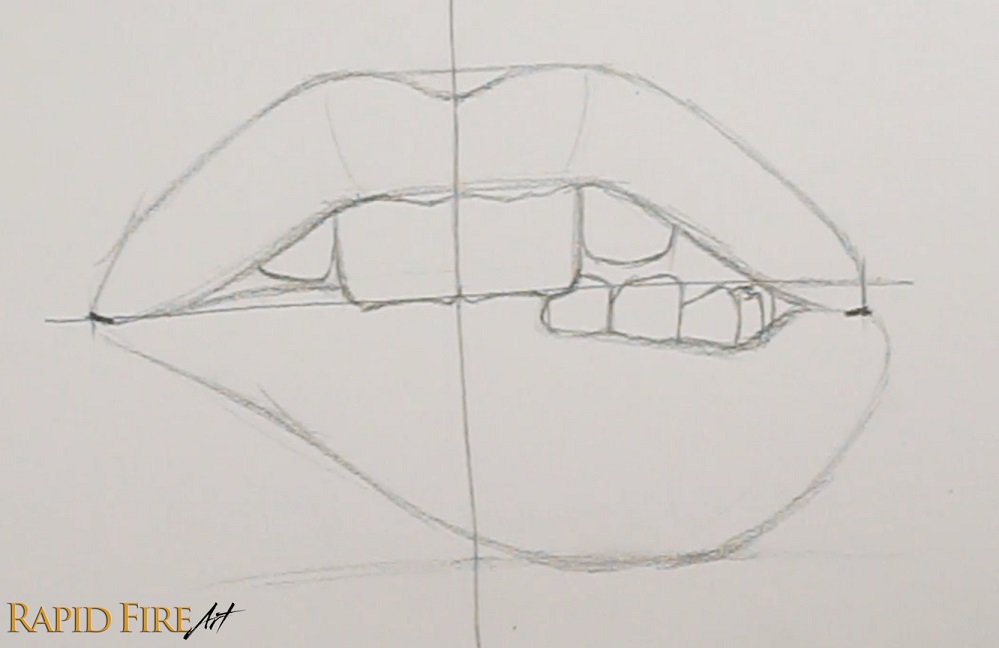
Then draw the bottom teeth. Make the last few teeth nearest the corner of the lips overlap each other as they disappear inside the mouth. Use the horizontal guideline as a reference if you want to match my drawing with yours.
Now you can tweak the drawing however you’d like to fit your personal preference. Then erase the guidelines.
Step 3: Shade Inside the Mouth
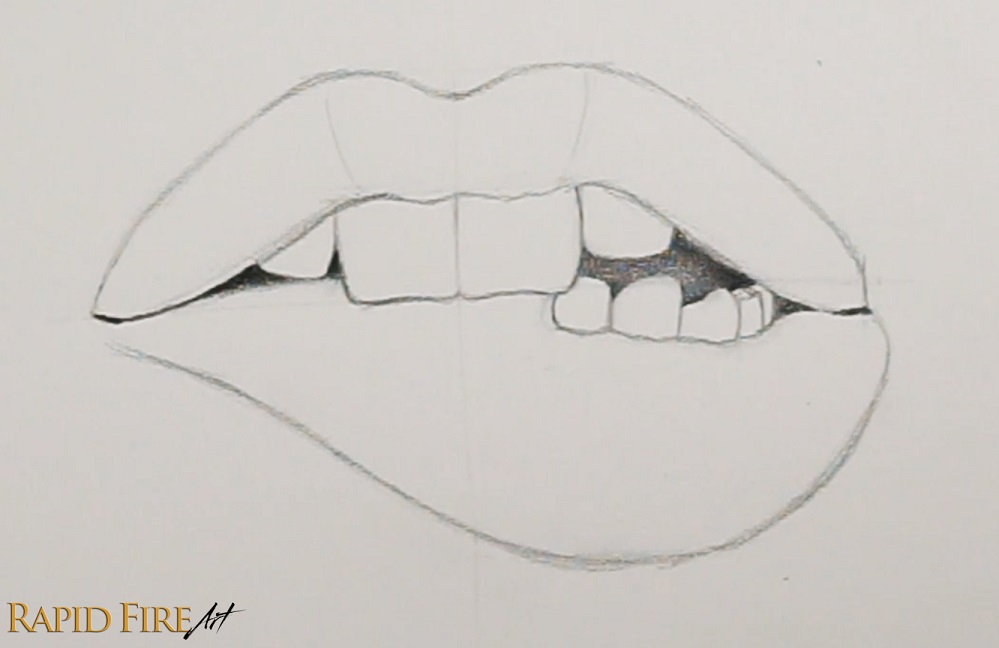
Using a softer pencil (2B), shade a dark layer of graphite inside the mouth. On the right side, where the opening is larger, we will see a hint of the tongue. We can make it look like there’s a tongue by simply shading lighter in the middle of the opening.
If you need to, blend your shading. I recommend a blending stump for dark areas like this. A blending stump is just a tightly rolled-up piece of paper. You can learn how to make one here.
If you shaded too dark, keep in mind that blending with a facial tissue can help lighten your work.
Step 4: Shade Lips and Teeth
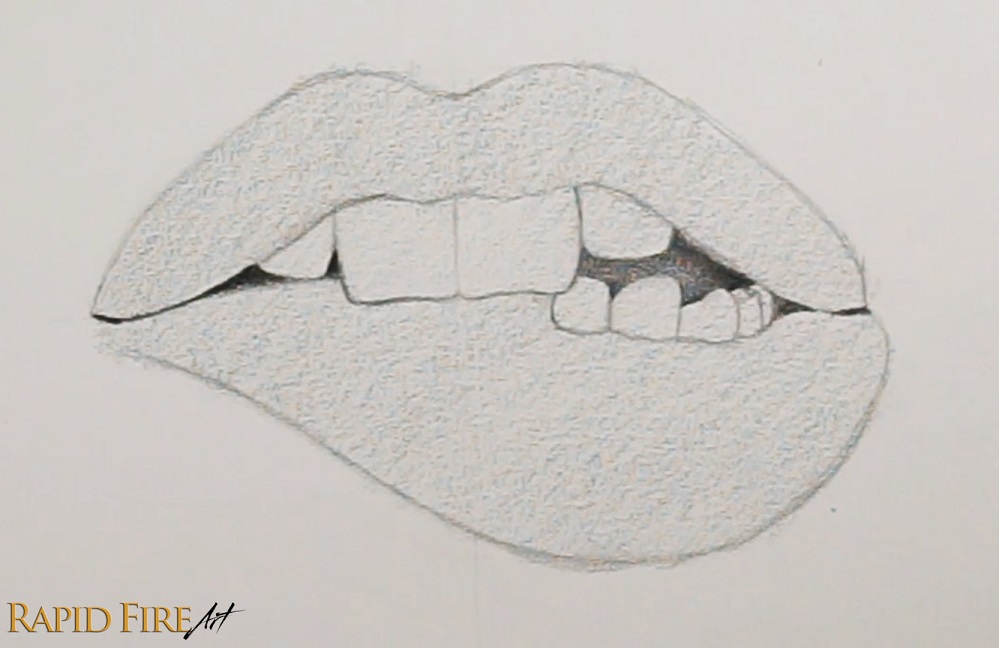
Using an HB pencil, shade a light, even layer of graphite across the entire drawing. If you want to learn how to shade consistently and smoothly, check out my in-depth shading tutorial here.
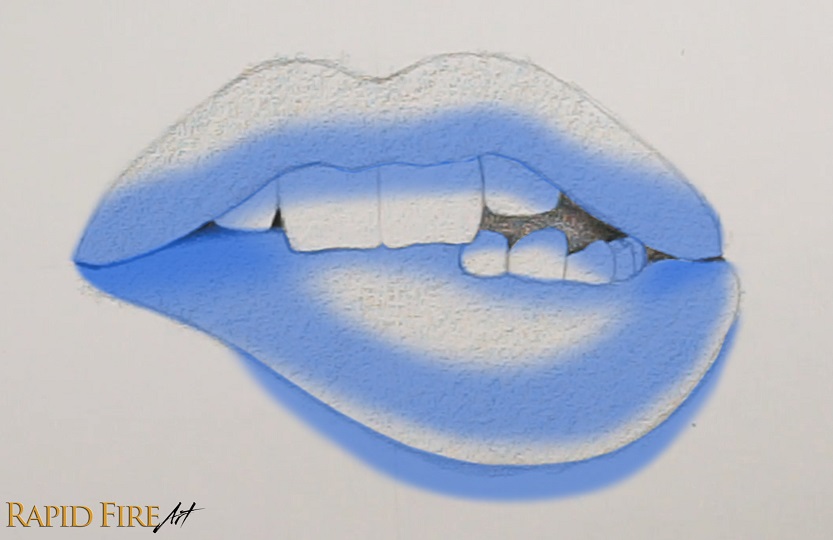
Shade the following zones (highlighted in blue) darker to make it appear as though there is a light shining down on the mouth from above. Don’t forget to leave a narrow strip of light along the bottom edge of the bottom lip.
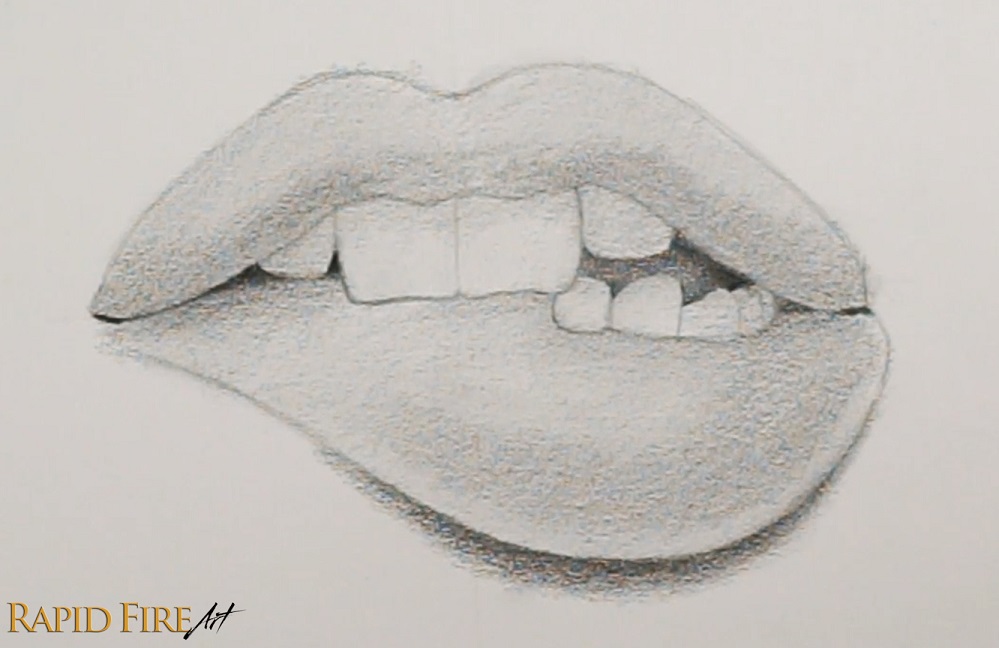
After shading, blend the newly added graphite using a tissue wrapped around the padded part of your finger. Swipe the drawing from light to dark to avoid smudging your work, and use a new spot on the tissue each time.
Step 5: Draw Realistic Bottom Lip Details
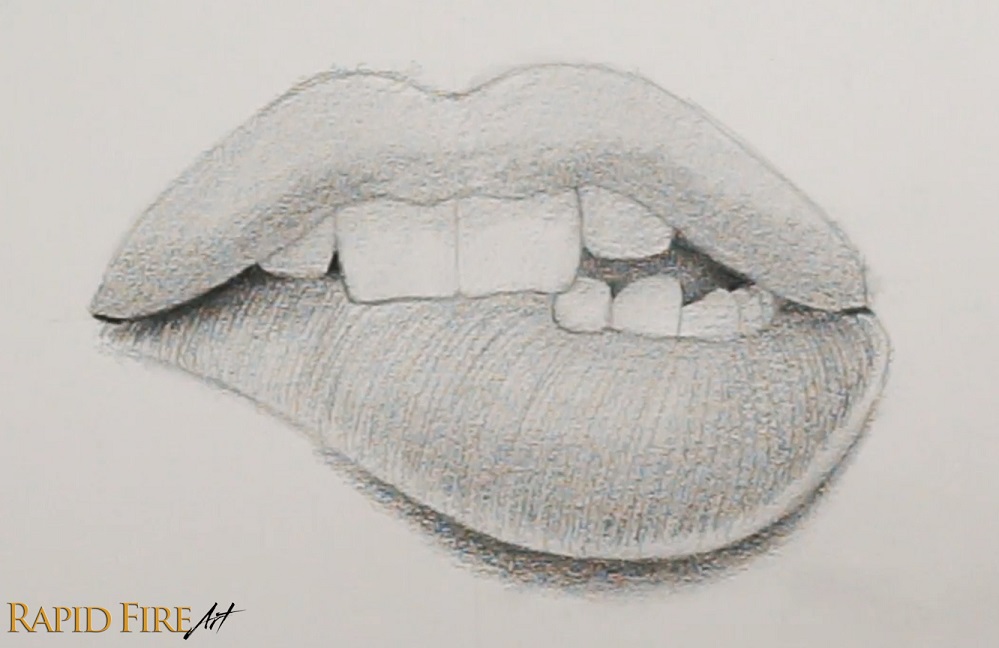
Switch back to the 2B pencil. Now let’s draw contour lines along the bottom lip to accentuate the curvature and give it some wrinkle texture. We will increase the density and values over time. For now, just focus on how you are shaping the lip using the contour lines you are laying down instead of where the lip needs to be shaded darker.
Where the lip skin is being stretched to the extreme (left side), my contour lines are almost straight.
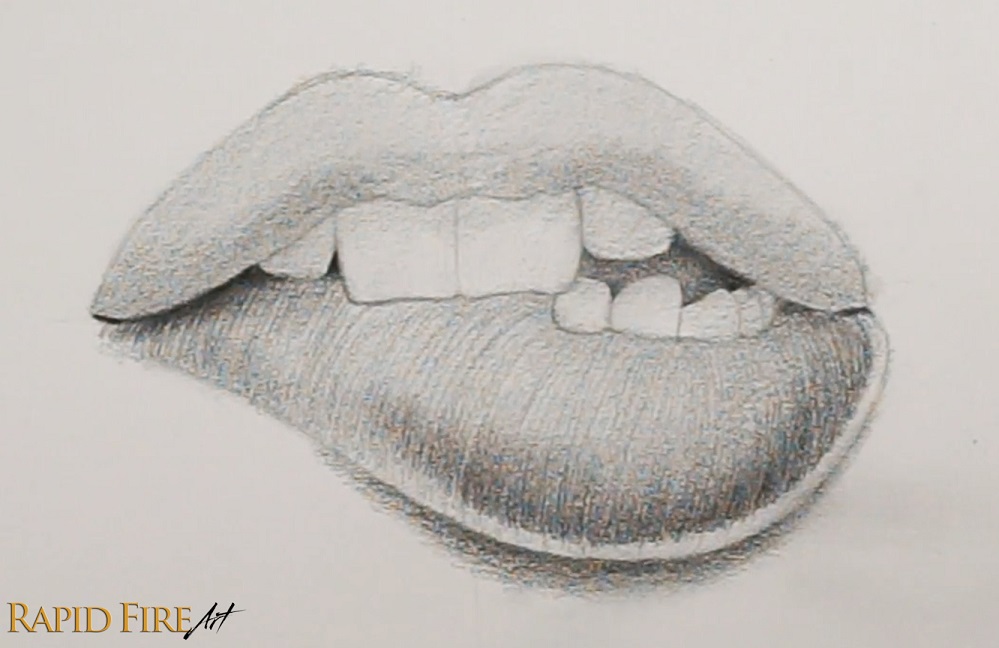
Happy with how your lip is shaping up? Let’s layer on some darker contour lines along the bottom of the lip to make the skin’s surface look as though it’s curving away from the light. Flick your pencil up as you approach the middle of the lip so your strokes fade out gradually.
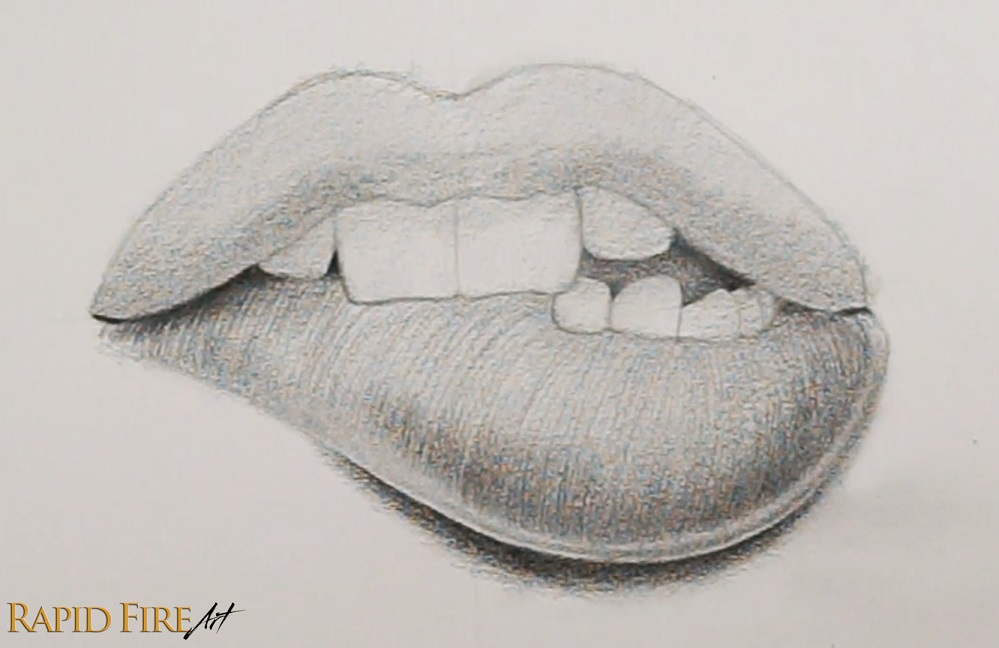
Now let’s add a super thin strip of dark graphite inside the strip of light located at the bottom of the lip.
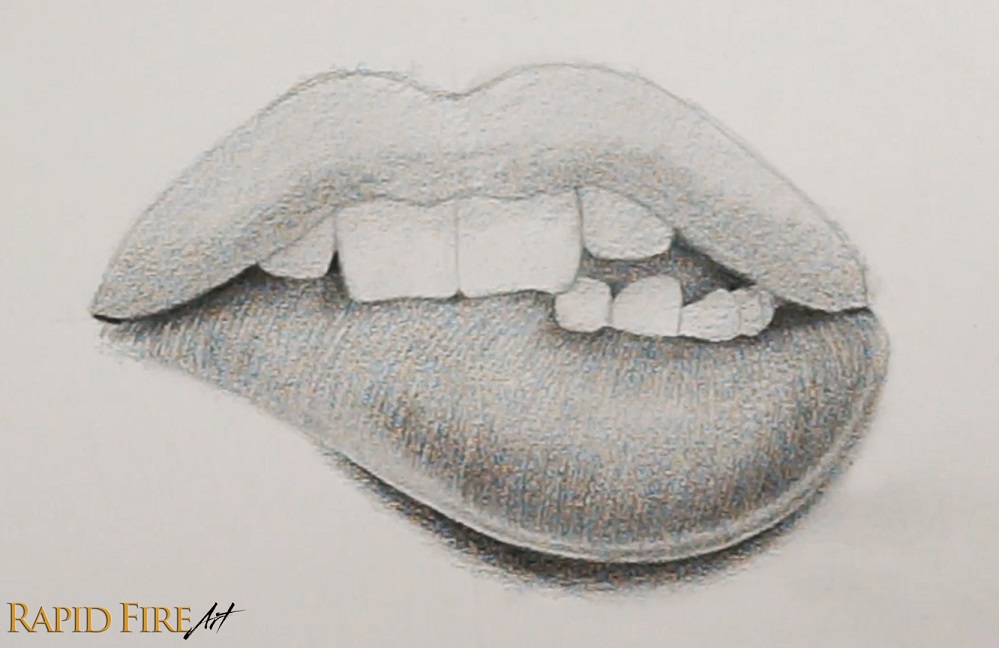
Let’s add darker contour lines along the top of the lip so it looks like the skin curves inward. Shade darkest near the corners of the mouth. Now our bottom lip should look quite plump!
If you like all the wrinkle details, you can skip blending to retain those sharp clean lines.
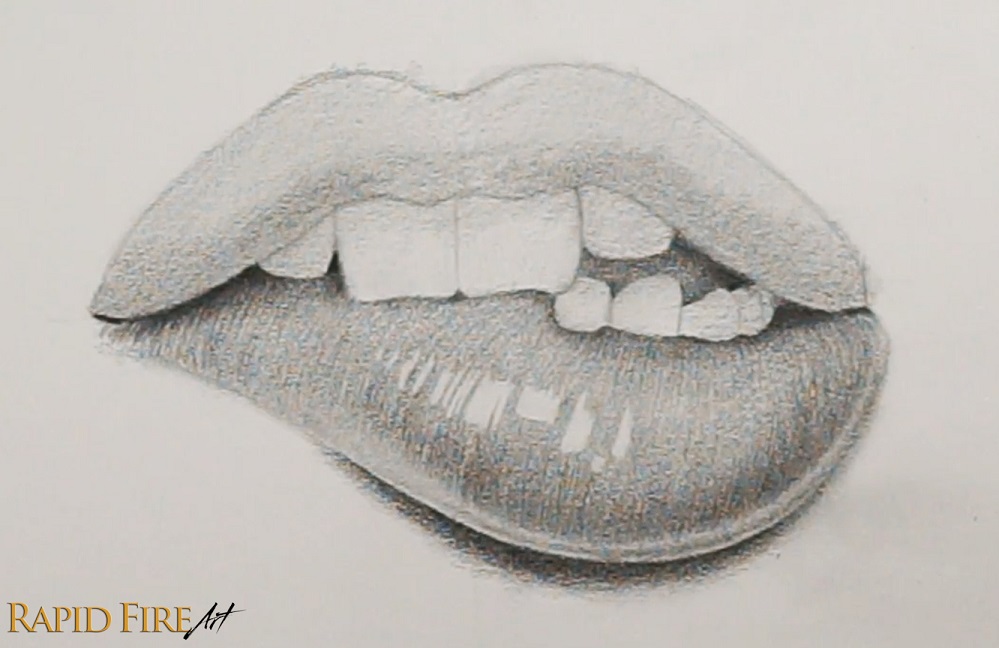
Let’s add some highlights along the middle of the lip using an eraser. I used an eraser pen for higher precision, but you can also use a cut-up block eraser. If you want to make super thin lines, consider using a kneaded eraser pinched flatly. Check out my DIY tutorial to make one yourself!
Step 6: Draw Realistic Top Lip Details
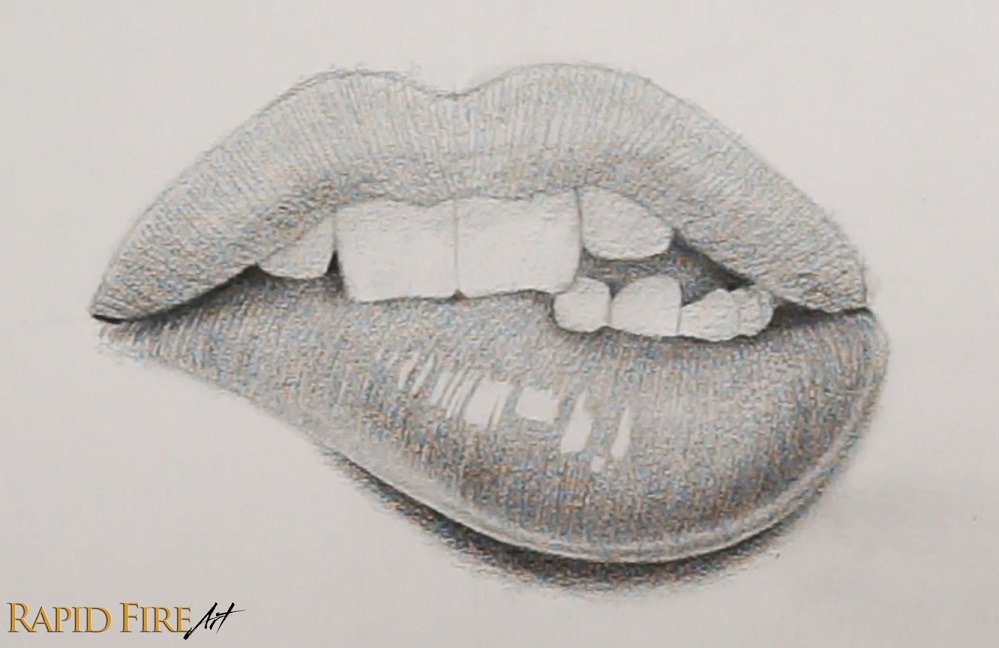
Now let’s work on detailing the top lip. Draw contour lines all the way along. Keep them light and just focus on how you’re curving your lines to form the lip shape that you’d like.
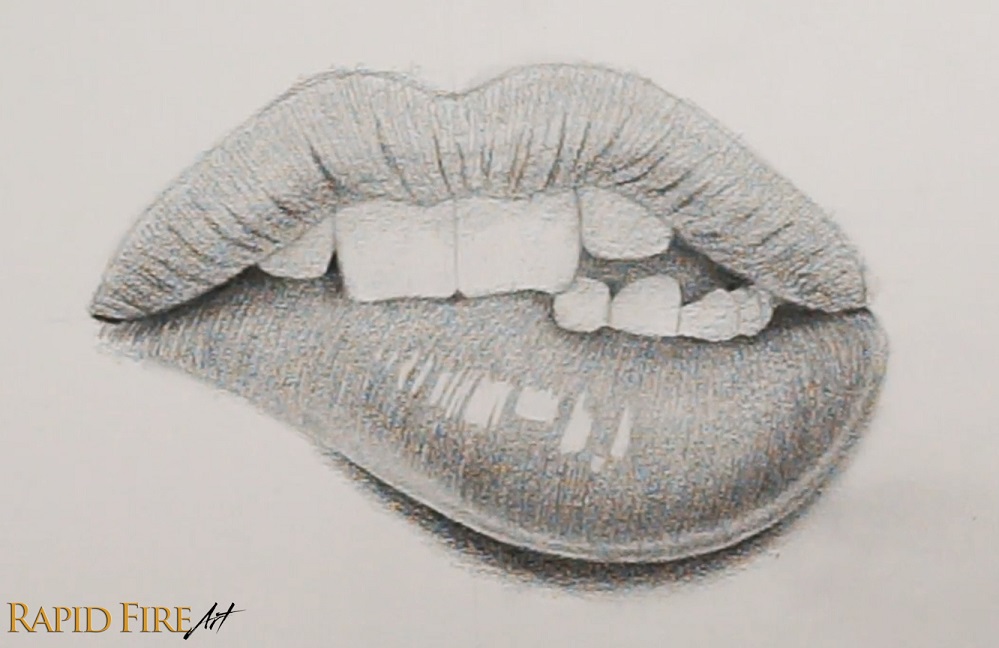
The top lip can be pretty wrinkly, so let’s go along the entire bottom half of the lip and darken/thicken some of our strokes to bring out more wrinkle texture. Vary the length and spacing to make them look more natural. You can even break up some of your strokes.
While leaving a strip of light at the very bottom of the lip, connect each wrinkle by forming a sort of “U” shape. Each of these dark wrinkles should be thicker at the bottom and tapered at the top.
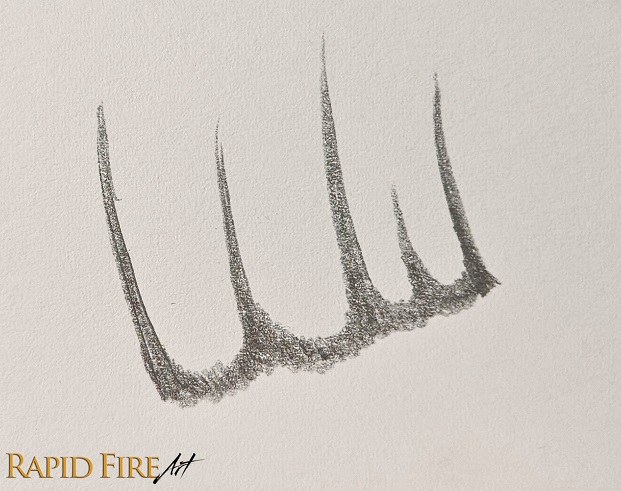
Above is a clear example of how I’ve connected the prominent wrinkles together.
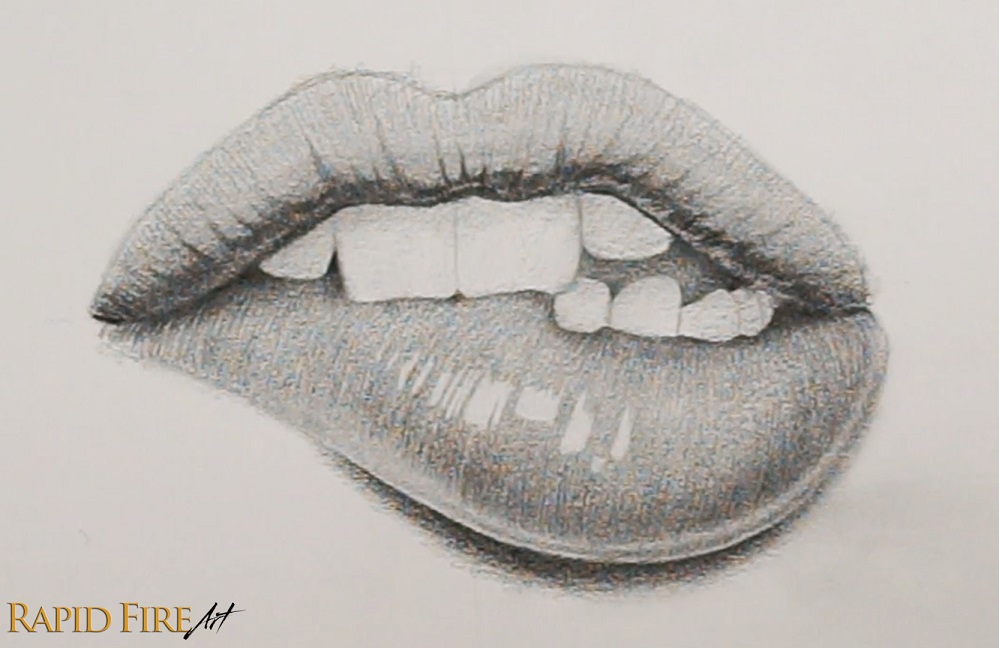
Darken the bottom edge of the lip using a very thin line. Then blend very gently, just swiping the tissue across the entire top lip.
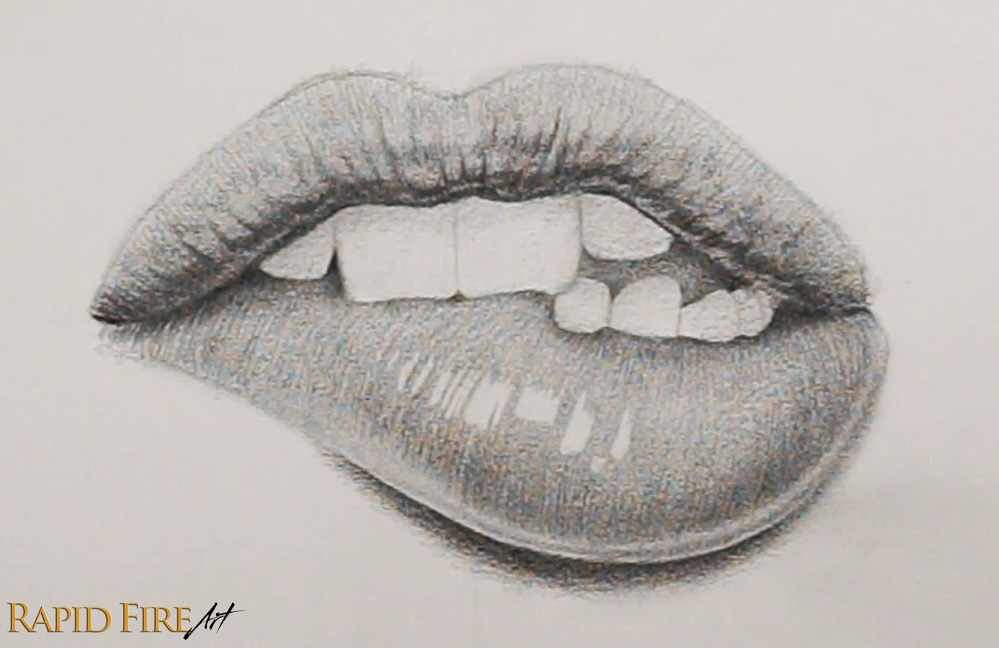
This step is optional and may be a little challenging. If you want to make the skin look bumpy, go along the mid-point of the lip and between some of your prominent wrinkles and shade small blocky shapes.
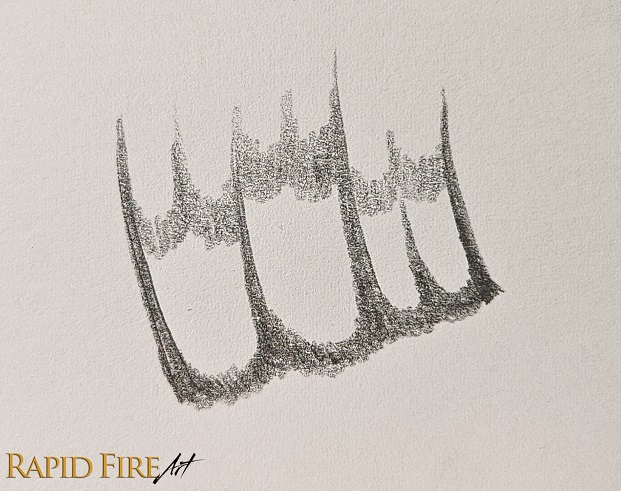
Above is a simplified example of my pencil strokes.
If you need further guidance, watch the clip below to see my shading in action:
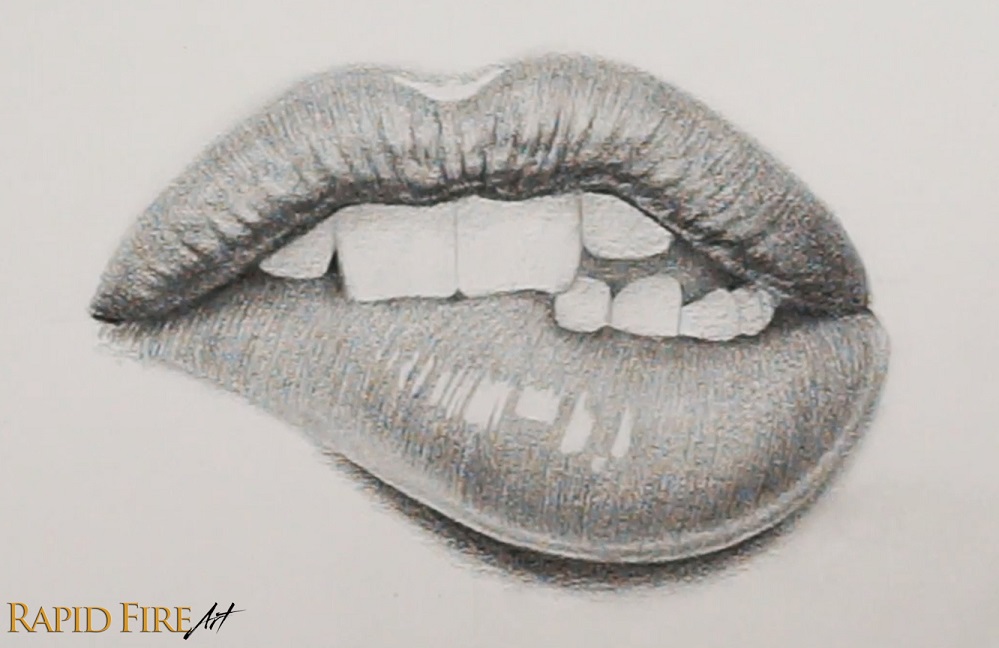
Along the very top of the lip, draw some slightly darker contour lines that fade out as you flick your pencil down. If you want your wrinkles to look more subtle, feel free to blend the wrinkles gently with a tissue.
Then add some highlights by erasing graphite along the cupid’s bow and some of the lightest bumps along the lip to help enhance that bumpy skin texture.
Step 7: Shade Teeth and Apply Touch ups
Now shade the teeth to give them more shape because they look very flat right now. Using an HB pencil, shade a cast shadow along the top of all the teeth. Then darken the crevice of each tooth, making sure to lighten up as you move away from the crevice – this shadow helps to make each tooth look rounded off instead of completely flat.
For the bottom teeth on the far right, shade them darkest because there is less light shining on that area. This also helps push the teeth a little further back in the mouth.
Add a small cast shadow on the left-most bottom tooth because the tooth positioned in front of it is blocking light.
Blend all the teeth and then sprinkle some highlights along some or all of them. If your highlights aren’t showing up well, you may need to shade your teeth darker for improved contrast.
Once you’re done shading the teeth, it’s time to look over the entire drawing as a whole. Take a few steps away from your drawing to take your mind off the small details, which you’ve been so focused on for the past while. You may notice areas that need to be adjusted to balance out the contrast or blemishes that need to be removed.
I’ve gone in and darkened my shadows further to make the drawing really pop. If your shading is smooth enough, your newly added graphite may not need to be blended.
I’ve also gone over some of my highlights with a white gel pen to make them look as bright as possible.
Continue Practicing With Printable Worksheet
Want to practice your shading more using these lips? Download my FREE printable worksheet with the lip outline already drawn in, so you can practice shading the lips and teeth over and over without having to redraw the entire mouth from scratch each time.

Click here to download your free worksheet!
Happy drawing!
Darlene

Darlene created RFA In 2013 with the goal of sharing simple yet detailed drawing tutorials with other artists on the world wide web. She is a self taught pencil portrait artist and Youtuber.


